Do you use menus in your restaurant? Revo XEF has the perfect solution to manage them. Menus, due to their operation and composition (starters, mains, etc.), are different from the rest of the products.
How to Create Menus in the Back-Office
1. Access the back-office.
2. Enter the group and category where you want to create the menu.
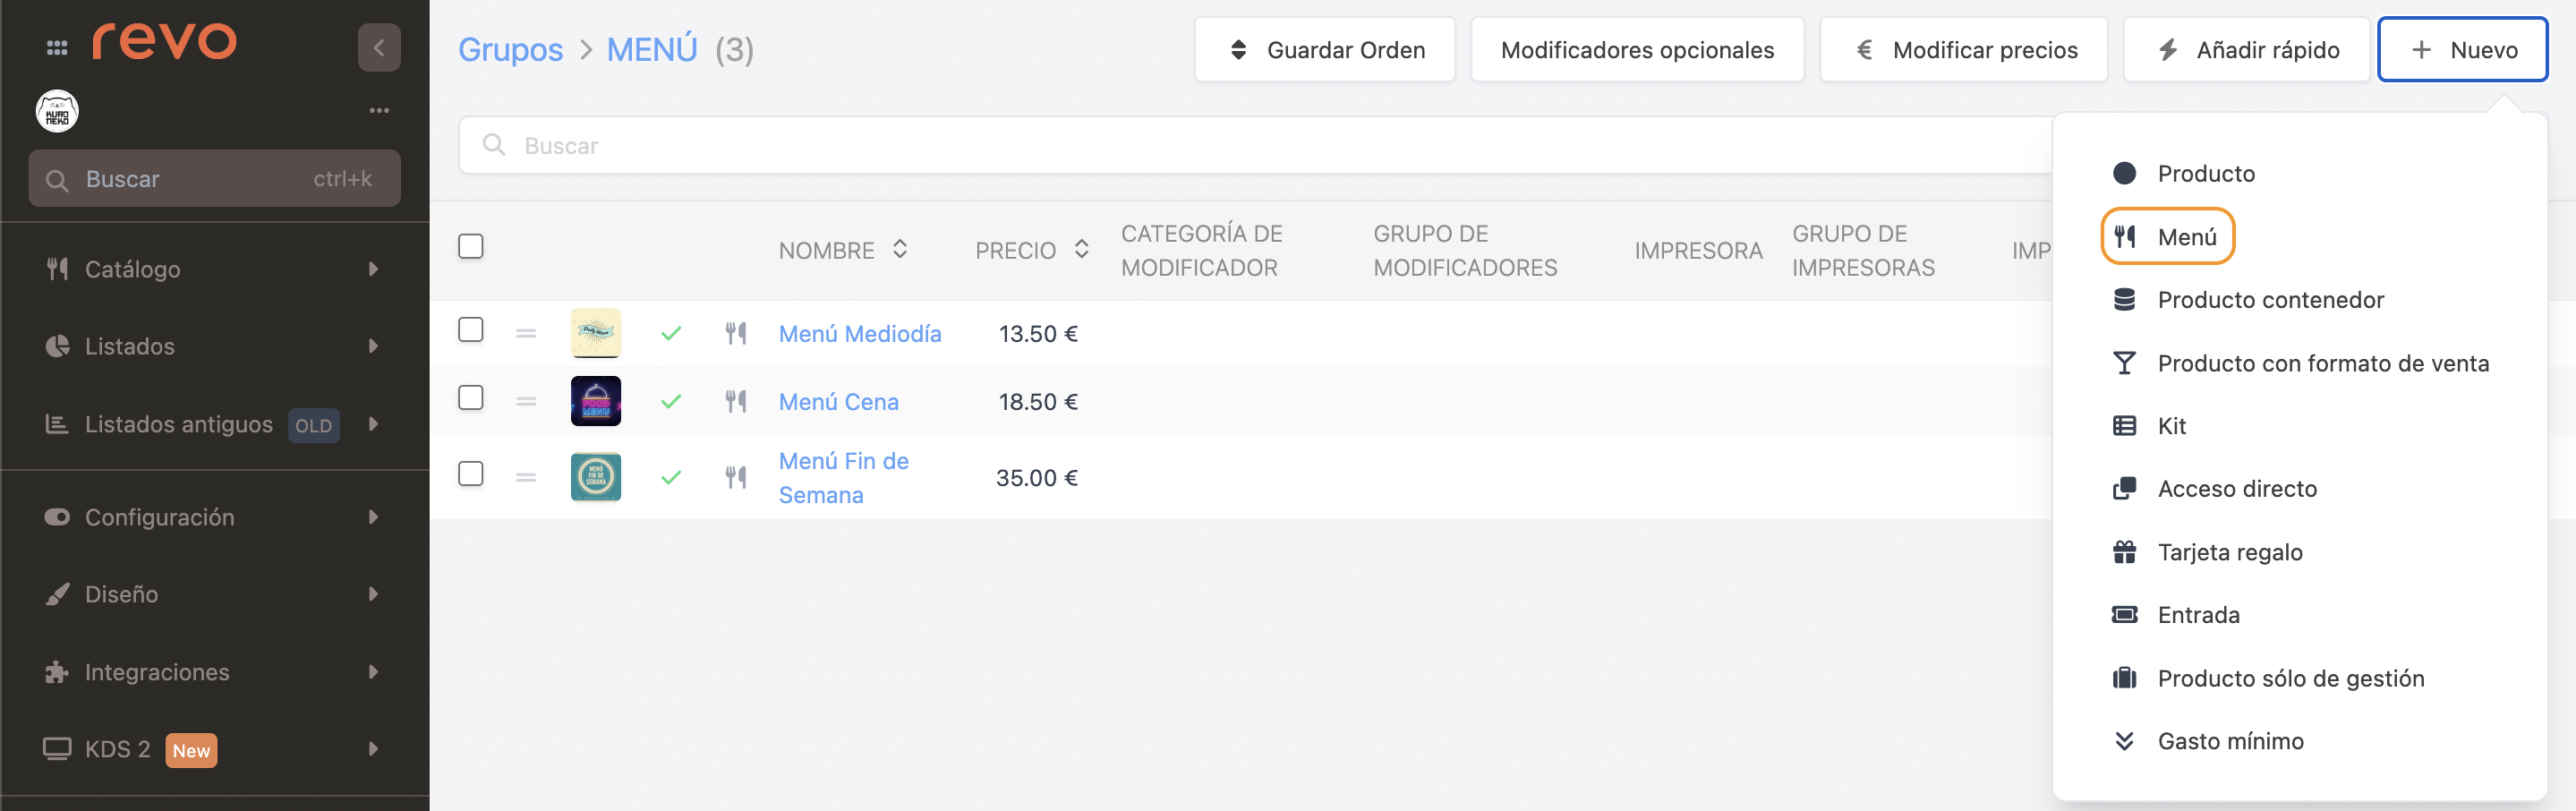
3. Click on the + New button and select Menu.
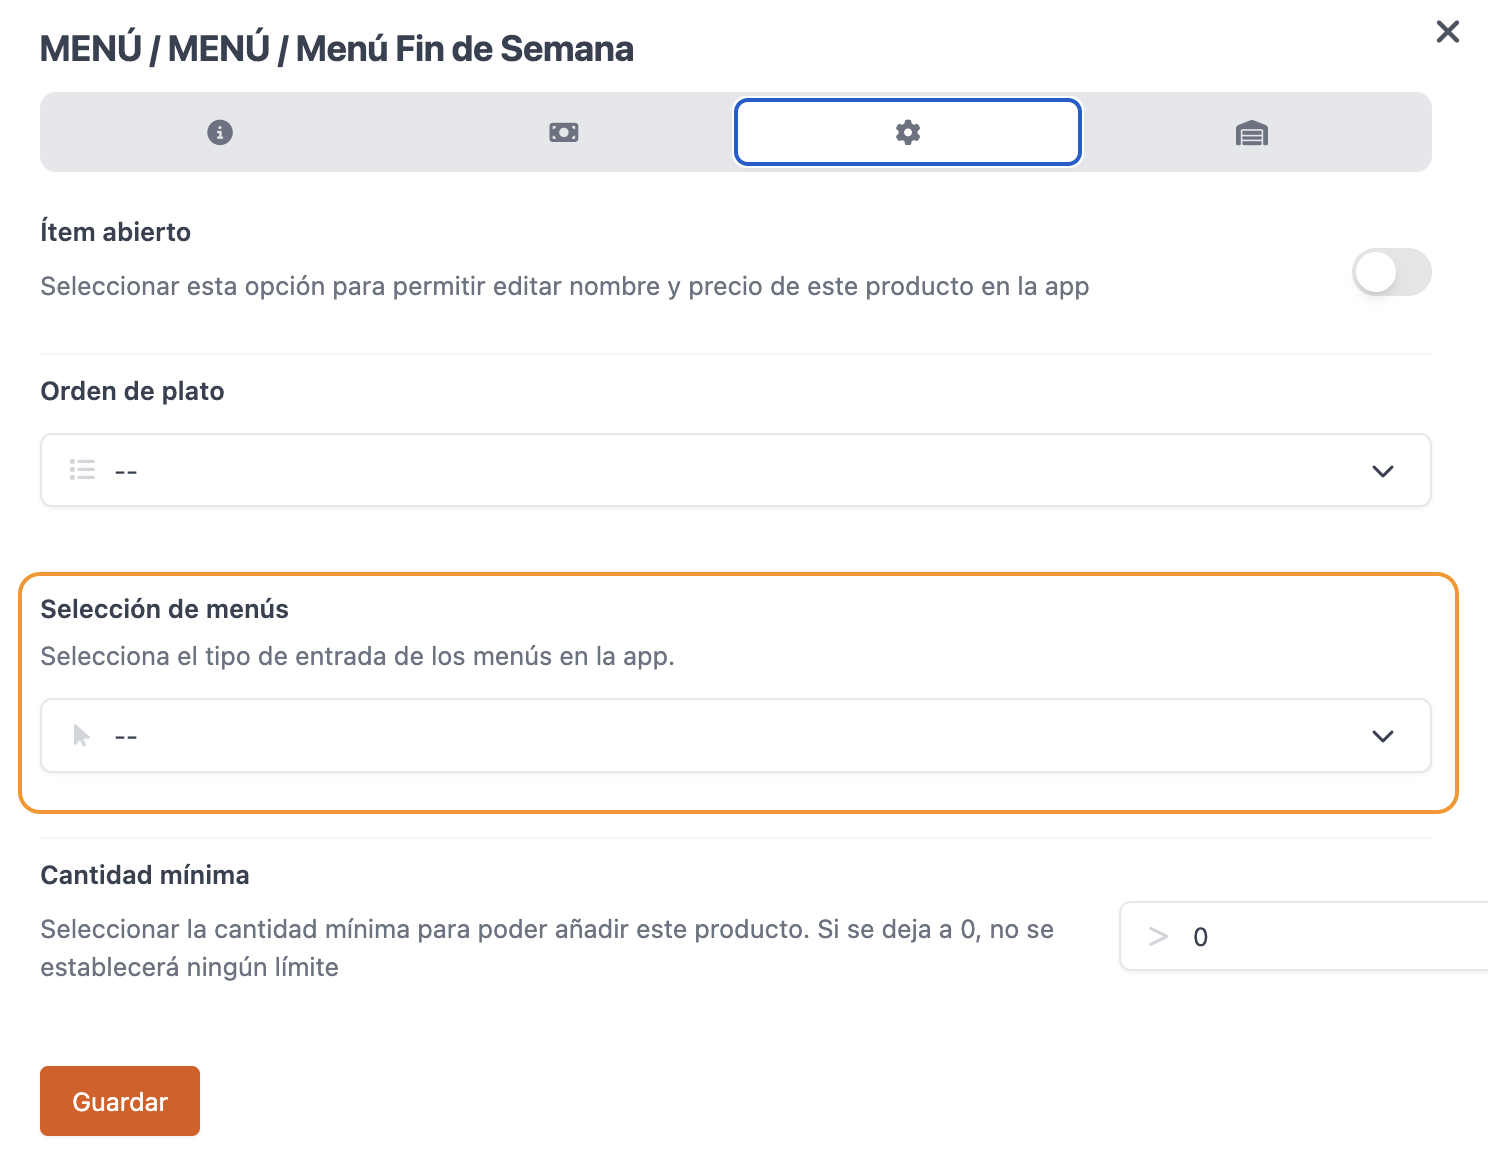
4. Create the menu like a product. The difference lies in Configuration / Menu selection, where you can choose whether it is standard or fast. Click Save.
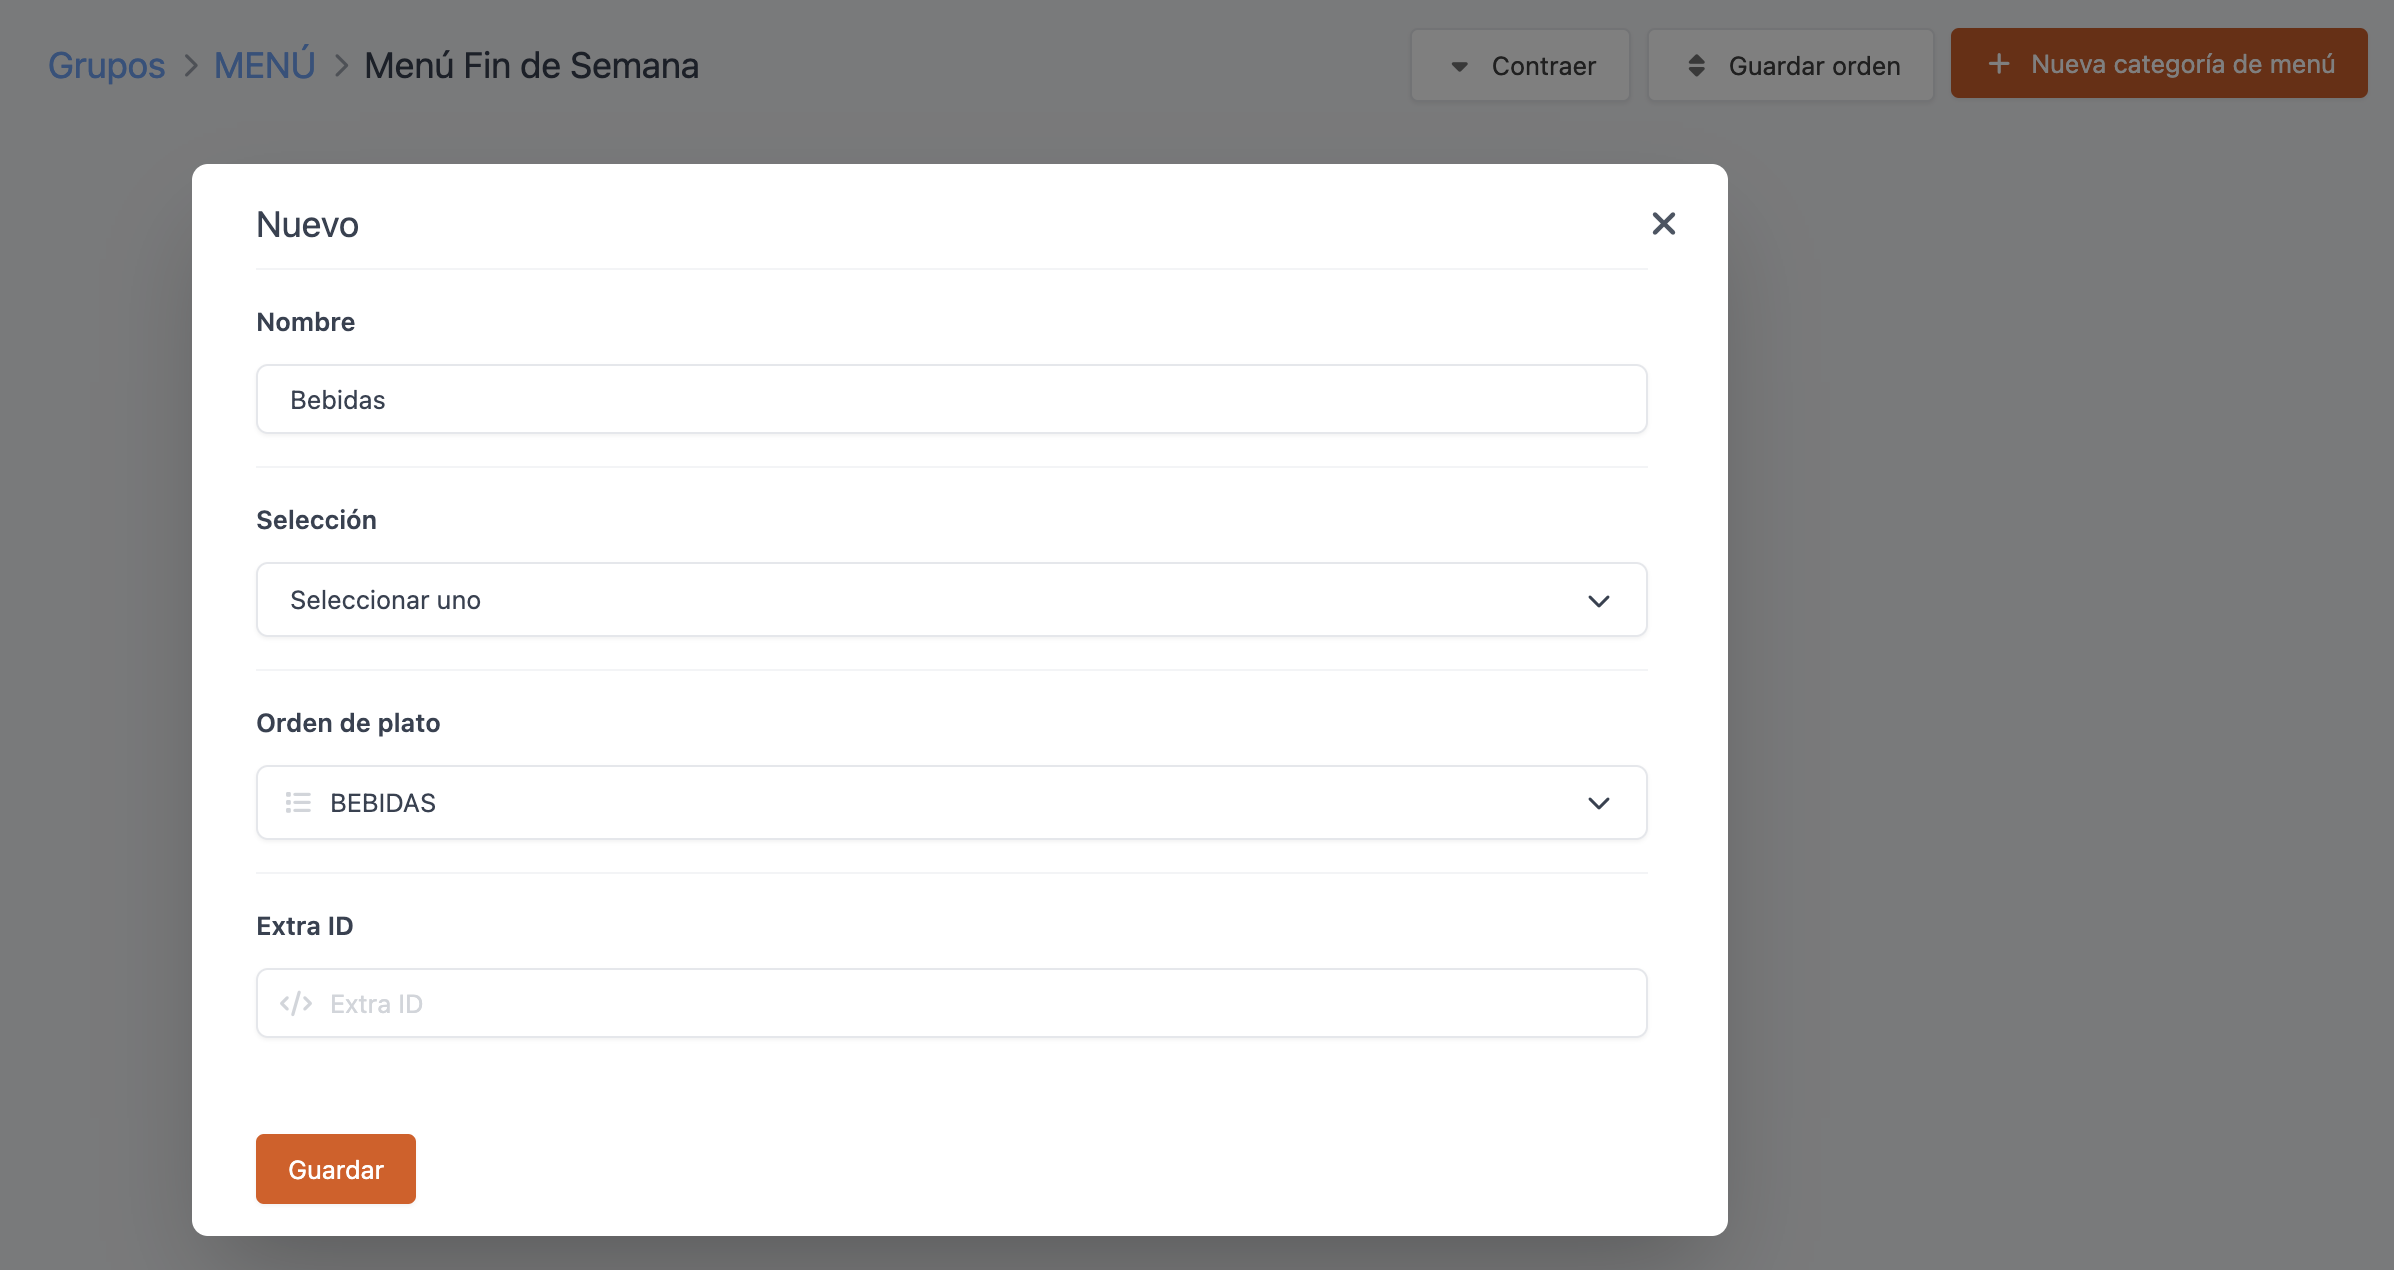
5. Access the created menu by clicking on Menu. Then, create the categories for your menu by clicking on + New menu category.
-
Name: Enter the name for the category, for example: Beverages.
-
Selection: Choose from the dropdown:
-
Select one: One product per diner.
-
Multiple options: Several products per diner.
-
Select one required: One required product per diner. It won't allow adding the menu until a product is selected.
-
Select by default: All products will be automatically selected. Used for tasting menus.
-
Custom: Indicates the minimum and maximum quantities of dishes that diners can select.
-
-
Course order: Choose the course order from the dropdown. More information here.
-
Click Save.
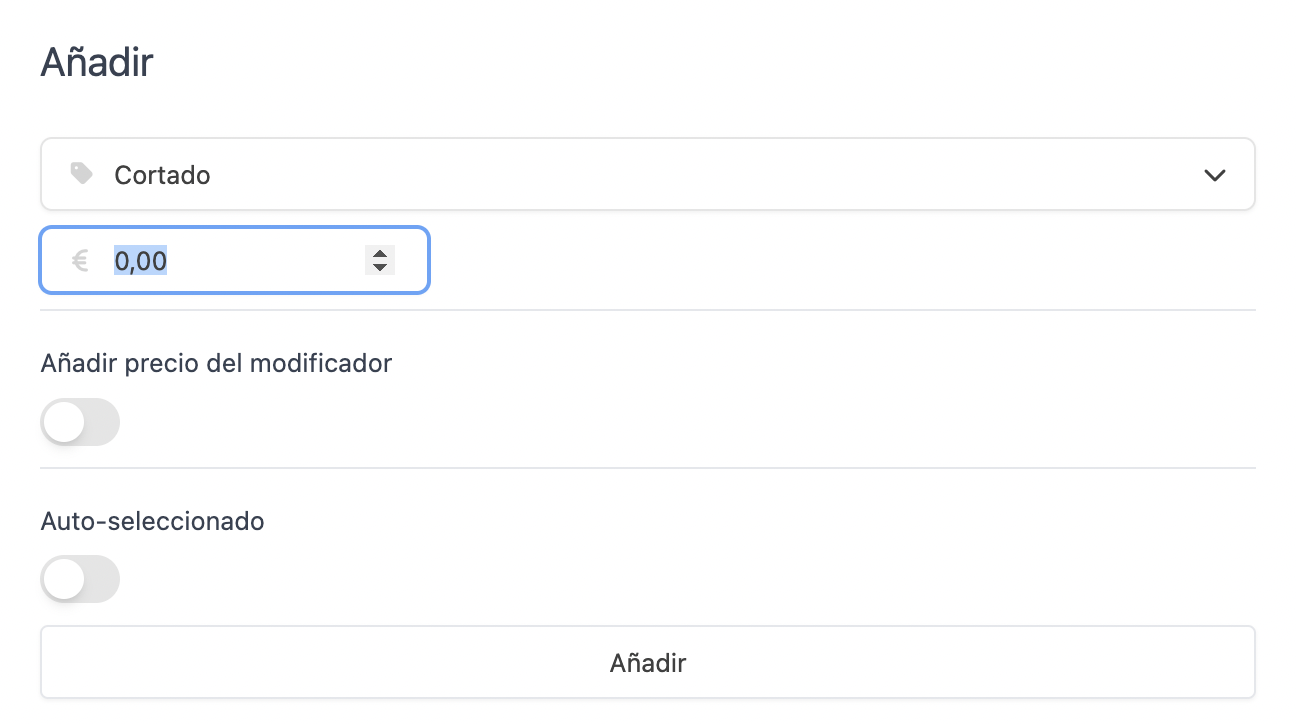
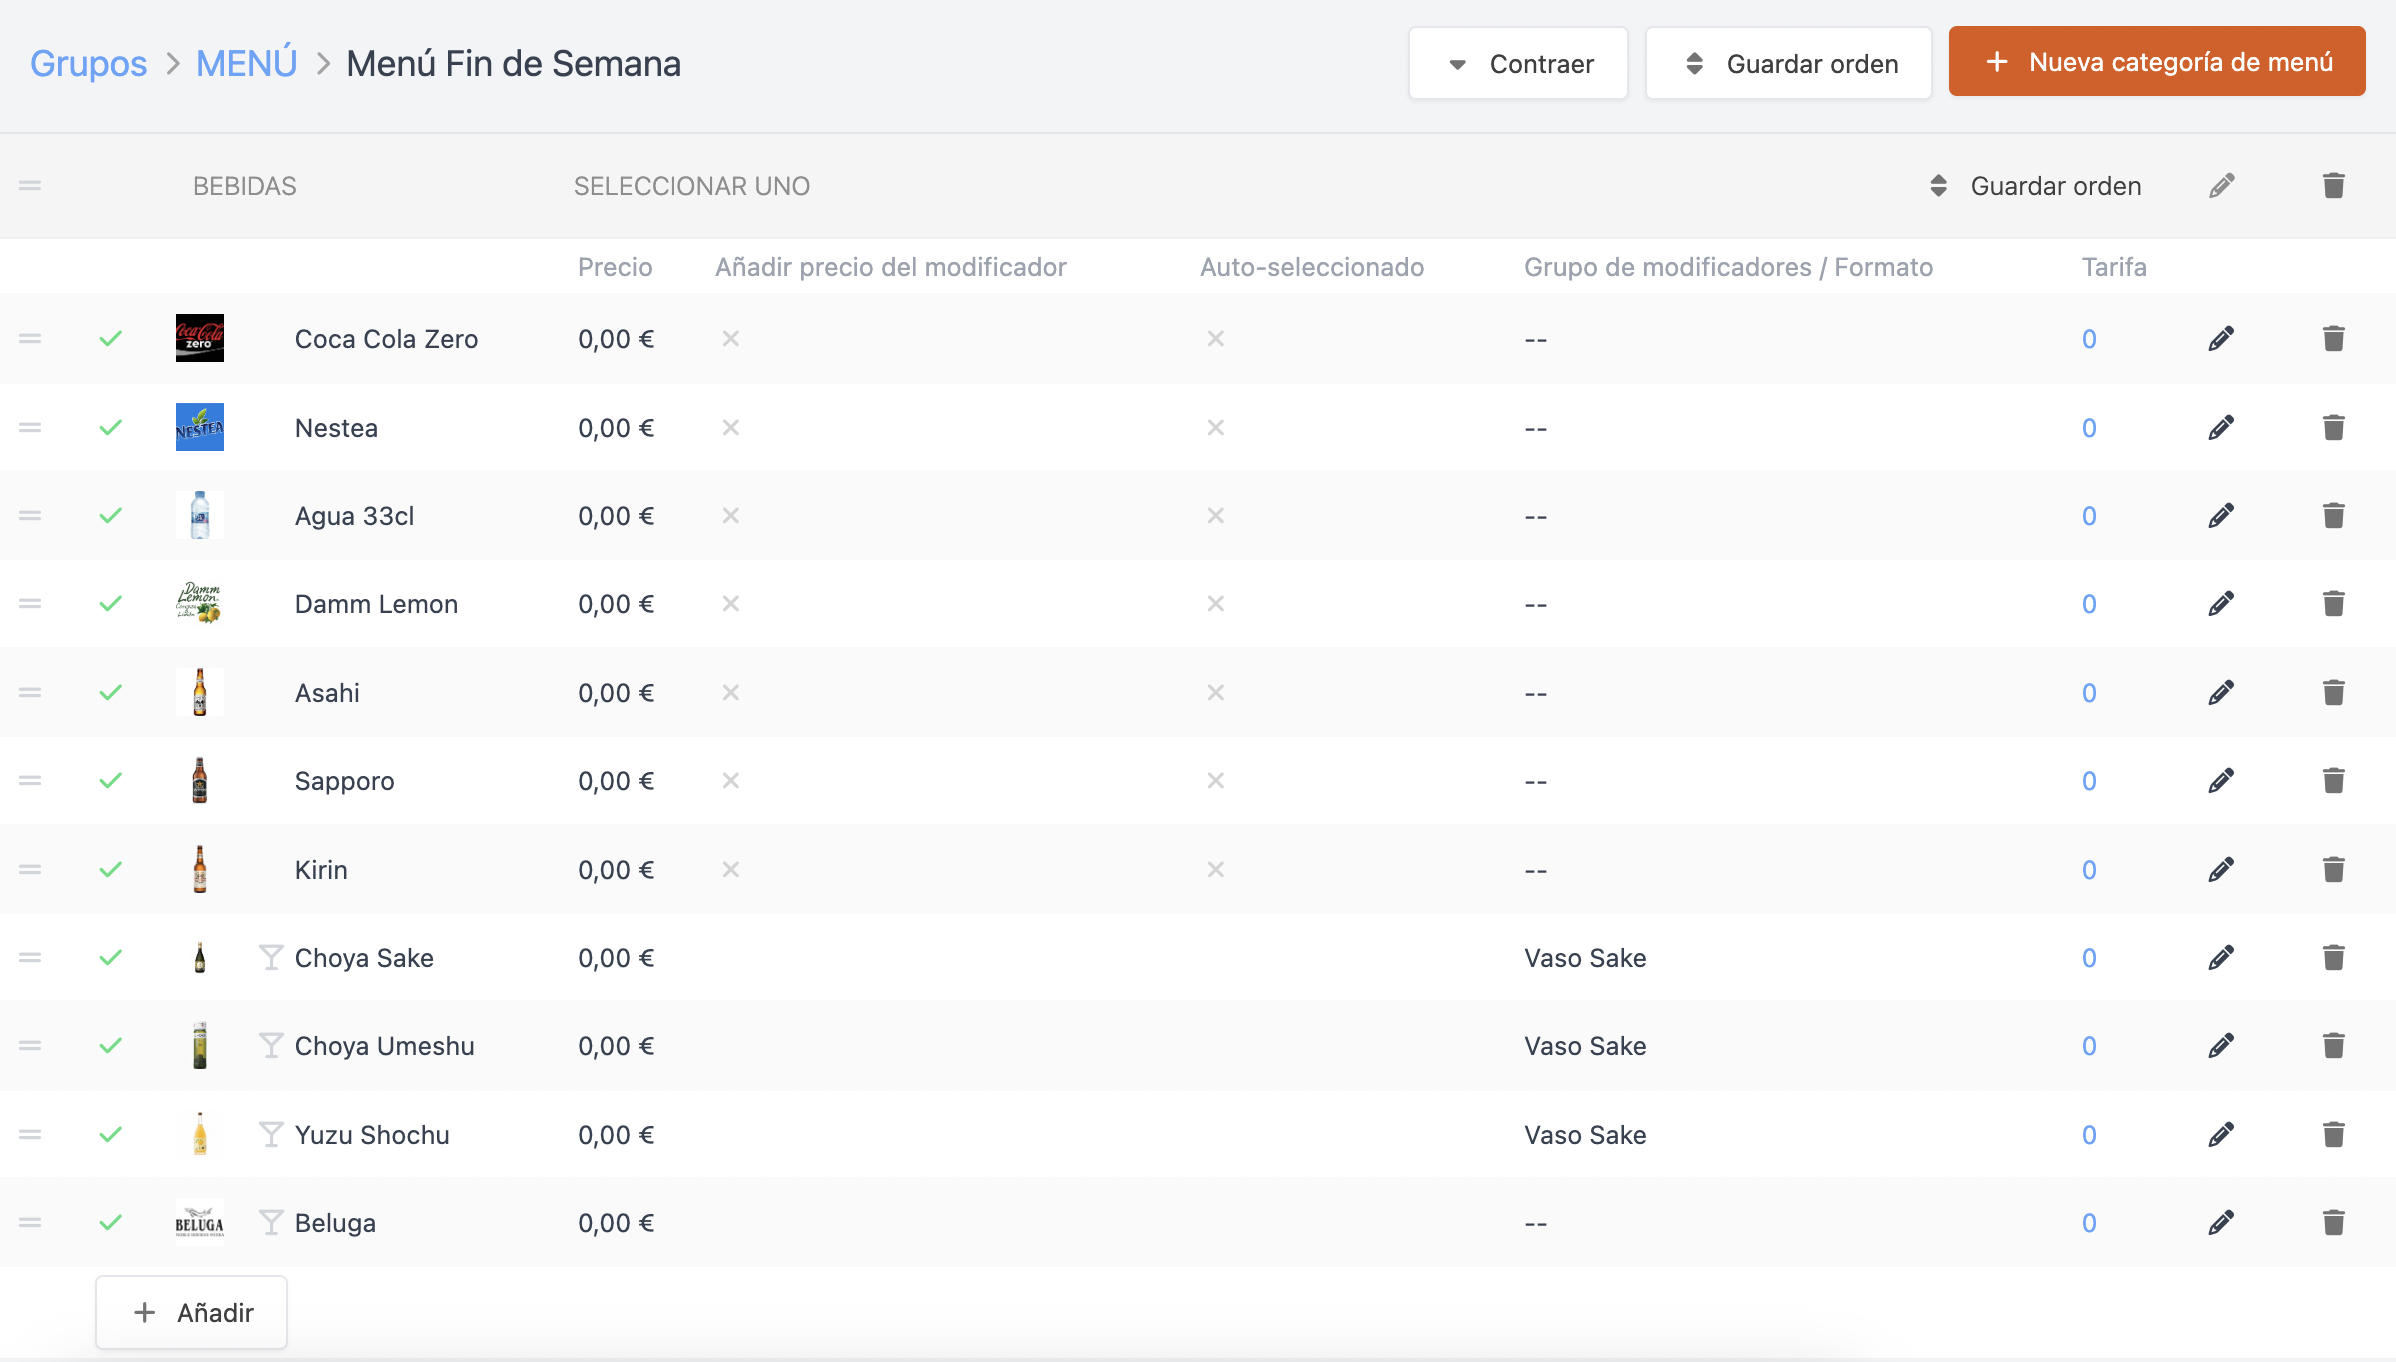
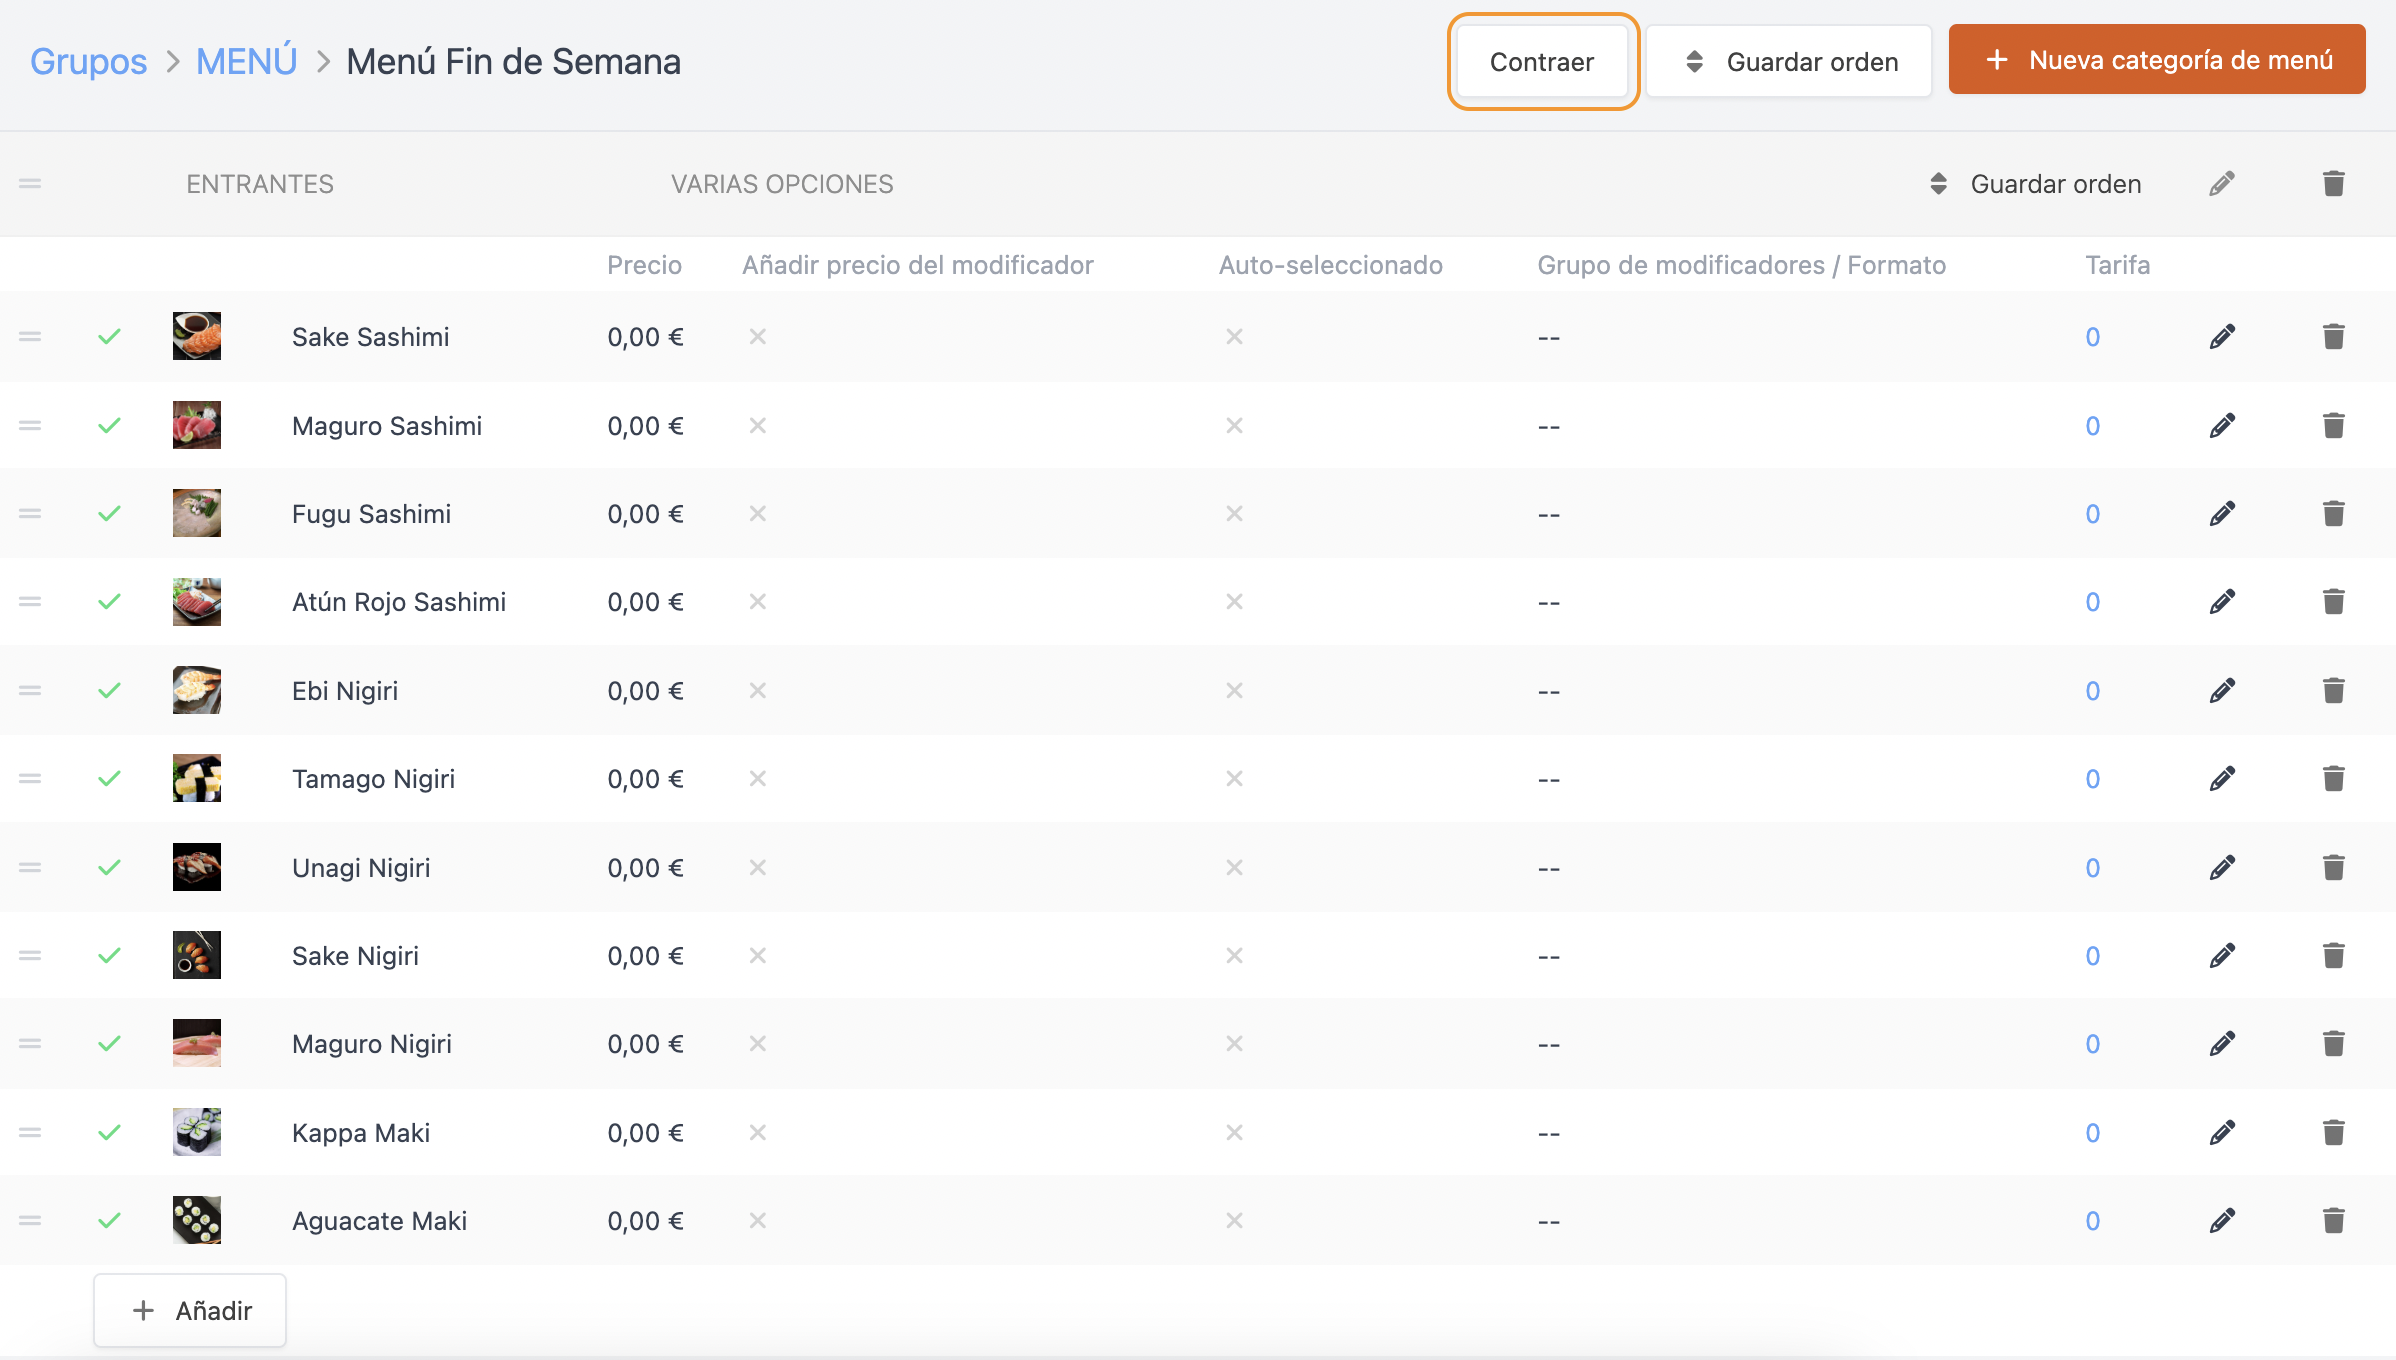
6. Add products by clicking Add:
-
Product: Click on this field to see a dropdown list of your products, you can type the name to search faster.
-
Price: Add a supplement if necessary.
-
Add modifier prices: If you activate , the modifier prices supplement will be added.
-
Auto-selected: Enable this so that it is always selected. If quick entry is used, as many products will be added as diners have indicated. For example, a tasting menu where all products are already selected.
-
Click Add.
-
Click on to edit modifiers/format:

-
Modifier group / Format: Add a supplement and select a modifier group or a sales format.
For example, a product normally sold by glass or bottle, but in the menu only the glass option is included.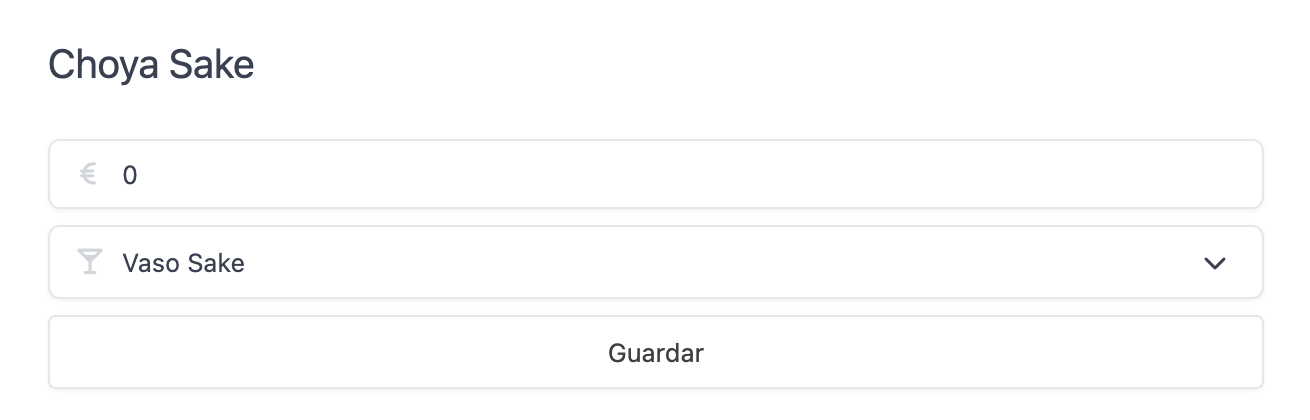
-
-
Rates: Configure rates by clicking on the 0. More information on creating rates here.
7. With these steps, your menu will be ready.
Menu Screen
From the menu screen, you can do the following:
Here you can create a new menu category, save the order of the categories, and collapse them.
1. Menu Categories:
-
Save Order: Save the new order of the products in the category.
-
: Edit the category.
-
: Delete the category.
-
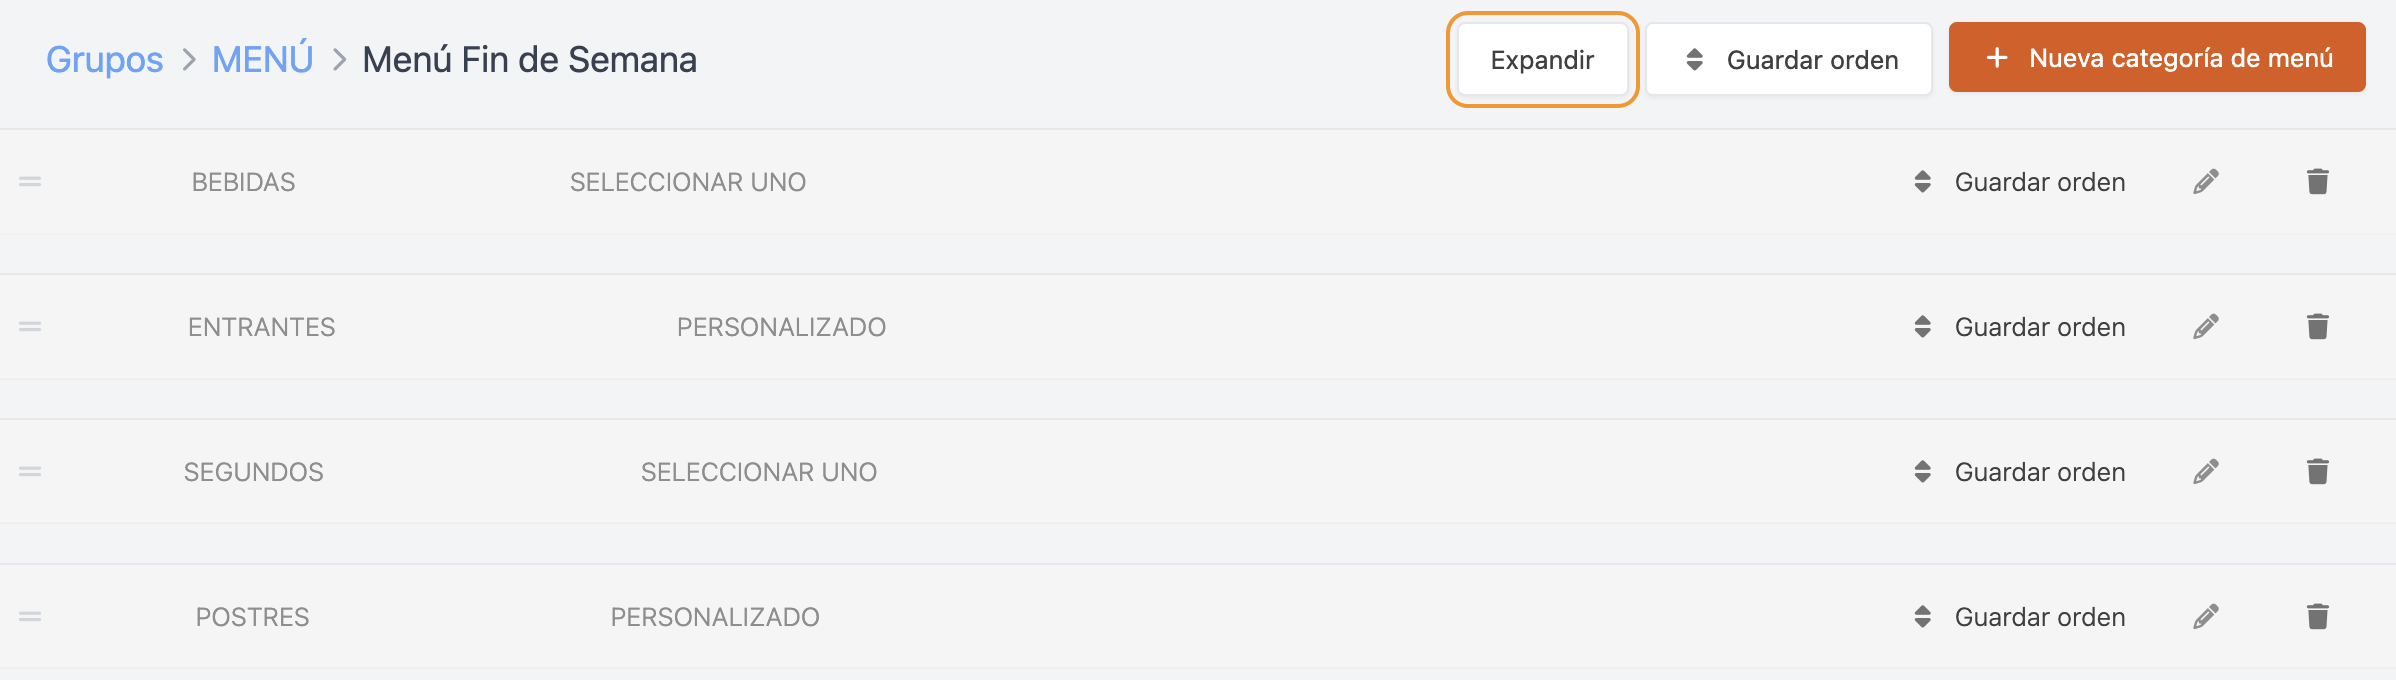
To change the order of a category, click the icon and drag it up. Use the Collapse button if there are many products, and it is difficult to drag.
For example: Move the Drinks' category to the first position:
-
Click Collapse.
-
Drag up while pressing the icon to the left of Drinks.
-
Click the Save Order button to the right of Expand.
-
Click Expand to see the products again.
-
2. Products:
-
If you are not using a product temporarily, deactivate it by clicking the icon, and a will appear. The product will not appear in the app until it is reactivated.
This action is recommended if you add all the menu products for the week or month. Simply activate and deactivate the products as needed each day, saving time.
-
Edit by clicking on the various fields and then click Save.
-
Delete by clicking on the icon.
-
Change the order by clicking the icon and dragging it to the new position. Then click Save Order.
Considerations for Working with Menus
There are two important options in the Order Configuration section of the back-office:
-
Print dish order in the kitchen: With this option enabled, dish orders (starters, mains, etc.) will be printed on the order ticket.
The ticket would look like this:
Order: {Order} Waiter: {Waiter} Table: {Table} Diners: {Diners} {Date} --------------------------------- MENUS --------------------------------- 2 [M] Daily Menu [Starters] 1 Edamame 1 Karage [Mains] 1 Soba - Chicken 1 Unagi [Desserts] 1 Dango 1 Japanese Cheesecake -
Print menu contents: With this option enabled, both à la carte and menu items will be printed together.
Recommended if in your restaurant, it is possible to order à la carte and menu items at the same time.
For example: At a table of 4 diners, 2 order the daily menu and 2 order à la carte.
- For à la carte and menu items to be combined, the general dish order and menu dish names must be identical.
- Menu items will be marked with an [M] for easy identification.
The ticket would look like this:
                  Order: {Order}
                  Waiter: {Waiter}
                  Table: {Table}
                  Diners: {Diners}
                  {Date}
                  ---------------------------------
                  STARTERS
                  ---------------------------------
                  1  Ebi Furai
                  1  Takoyaki
                  1  [M] Tsukune
                  1  [M] Ebi Onigiri
                  ---------------------------------
                  MAINS
                  ---------------------------------
                  1  Unagi
                  1  Ramen
                  1  [M] Katsu
                         - Chicken
                  1  [M] Udon
                         - Beef
                  ---------------------------------
                  DESSERTS
                  ---------------------------------
                  1  Dango
                  1  Mochi
                     - Matcha
                  1  [M] Japanese Cheesecake
                  1  [M] Tayaki
                         - Matcha