Steps to set up an EPSON TM-m30 printer with Revo
1.Connect the printer to the power adapter and to your local network (LAN) via ethernet cable to the RJ45 connector. Both are located on the back of the device.
2.In order to access the printer configuration portal for the first time, you must keep the Feed button pressed while turning the printer on through the Power switch right beside it.
Make sure you have previously placed the roll of paper inside the printer
3.Once step 2 has been completed, you'll get a printout of the current configuration of the printer. Then you should look in the network configuration section.
- 3.1. Locate the IP of the printer and access it from a device using the browser.
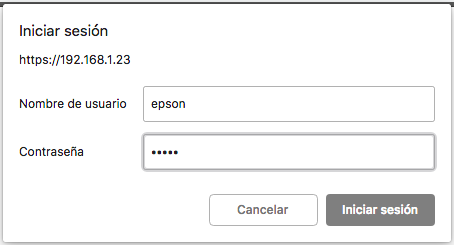
- 3.2. Instead of typing a URL as you usually would, access the printer's IP. For example: http://192.168.1.23
- 3.3. Then a small window appears, asking us for a user (epson) and password (epson).
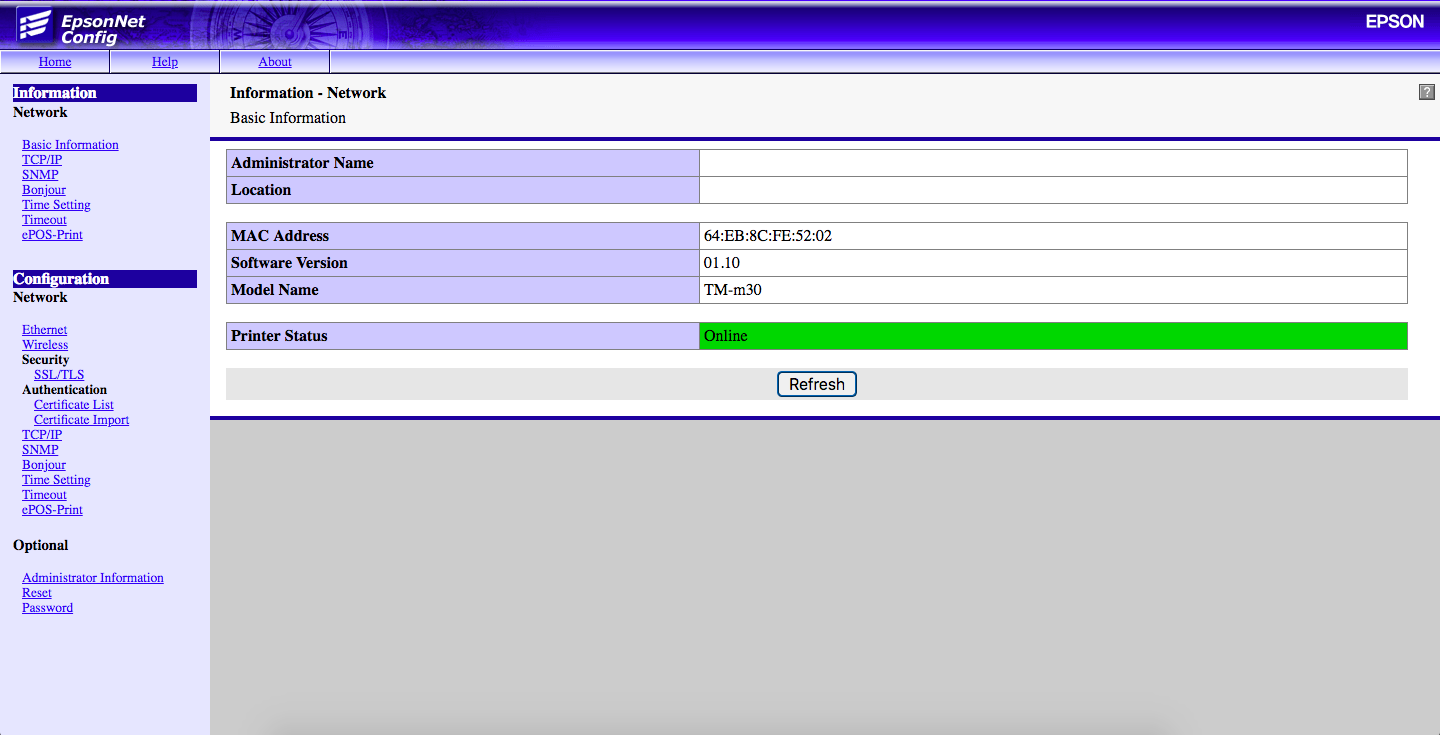
- 3.4. Once you have logged in, enter the main configuration screen.
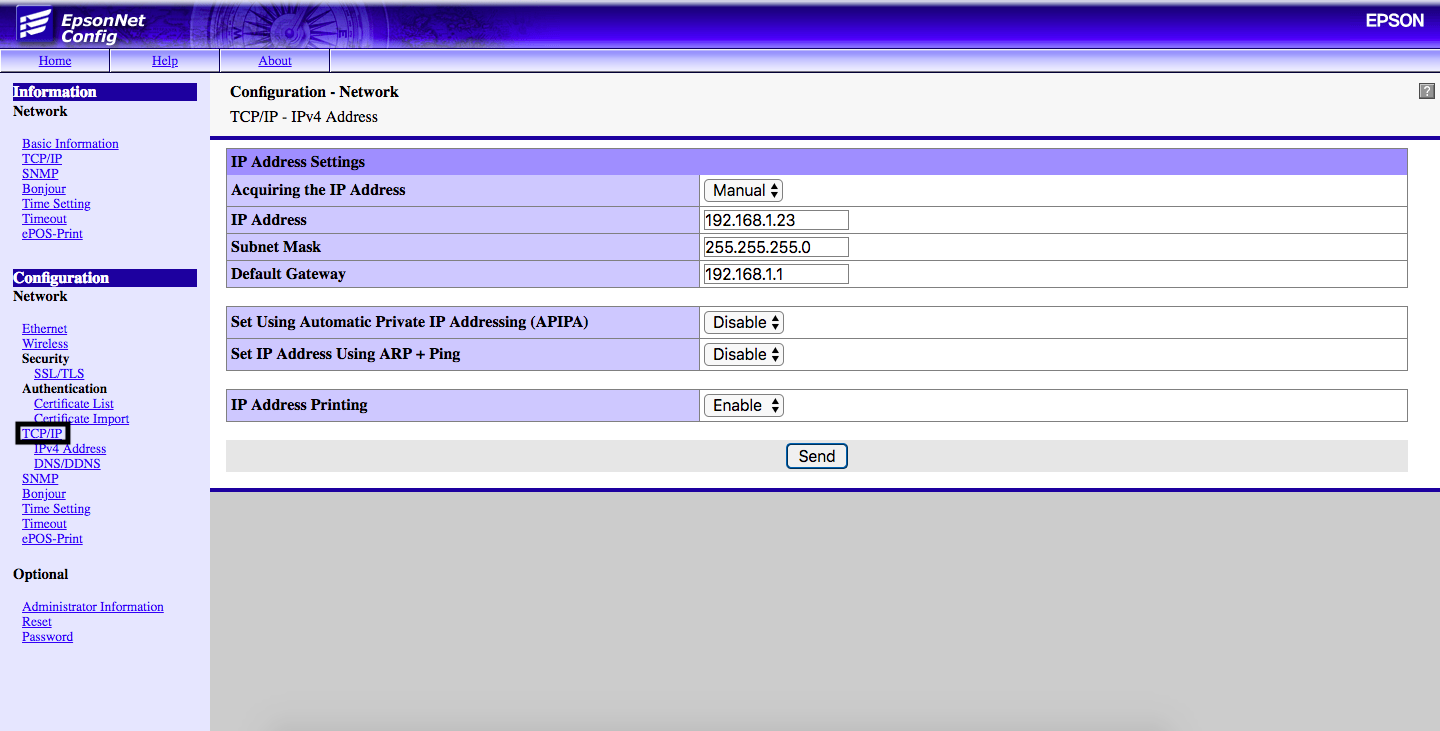
4.Once within the printer setup, proceed to change the IP for a static one; for this, go to TCP/IP. Configuration -> Network -> TCP/IP
- 4.1. Change the first option Acquiring the IP Address to Manual.
- 4.2. Replace the IP Adress with the one you want to assign to the printer, taking into account the range of IPs of your network.
- 4.3. In Subnet Mask, enter your network mask address. As a general rule, it is 255.255.255.0.
- 4.4. As in IP Adress, take into account your IP range before setting up the gateway in Default Gateway.
- 4.5. Save the changes by clicking on the Submit button.
Here is an example of static IP configuration:
- 4.6. Now a new window will appear, indicating that the printer must be restarted to enable the changes. For this, press the Reset button.

5.Once the previous steps carried out, the printer is set up and you just need to add it to the Back Office.
- 5.1. Enter the Back Office of the Revo account.
- 5.2. Go to Settings
- 5.3. Now in Printers, create a new printer:
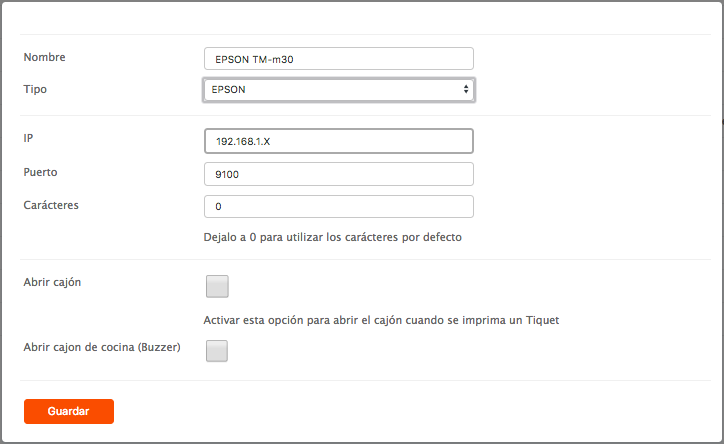
- 5.4. Name: Enter the name you want to give to the printer to identify it later.
- 5.5. Type: Select EPSON.
- 5.6. IP: Enter the IP previously established in the printer setup.
- 5.7. Port: Leave it as it is, 9100.
- 5.8. Characters: it is recommended to leave it at 0. It can be edited later.
- 5.9. Open drawer: This option allows us to open the drawer when a ticket is printed.
- 5.A. Open kitchen drawer (Buzzer): Enable it if you want a bell to sound when printing a ticket. (The bell is not included, it must be purchased separately)
6.If you have properly carried out all the steps, you will have your EPSON TM-m30 set up in Revo.