
- STATUS: ACTIVE
2. HOW TO CONFIGURE REVO HANDY?
3. HOW DOES IT WORK?
4. PRINT TO KITCHEN WITH REVO HANDY
5. HOW TO MAKE REFUNDS OF ORDERS MADE IN REVO HANDY
6. POSSIBLE ERRORS AND HOW TO FIX THEM
Revo Handy is our all-in-one terminal. We can manage orders, print tickets, and process payments, all on a single device.
1. PRELIMINARY CONSIDERATIONS
- If a customer wants to add Revo HANDY to their Revo XEF account, they must request the corresponding payment terminal from their bank. You can check the available payment terminals according to the payment gateway, here.
- In order to process card payments through Revo HANDY, we must have the bank/gateway payment application installed, configured, and working properly on the payment terminal.
- Adding Revo HANDY (order-taking terminal) to a Revo XEF account counts as an extra device on the corresponding account.
- In case of receiving the payment terminal without the Revo HANDY application, we must follow the steps of the following article App registration on payment terminals.
- Revo HANDY is not compatible with sending payments to PMS.
When starting the configuration of the Redsys virtual gateway, you will receive an email from Redsys with the FUC number.
Additionally, we also have the Redsys administration module where we can obtain all configuration data and see all transactions.
2. HOW TO CONFIGURE REVO HANDY?
First, we must activate the Revo HANDY license in the Revo XEF account.
Next, we must add and configure the Revo HANDY integration:
INTEGRATION CONFIGURATION
1. Access the back-office of Revo XEF.
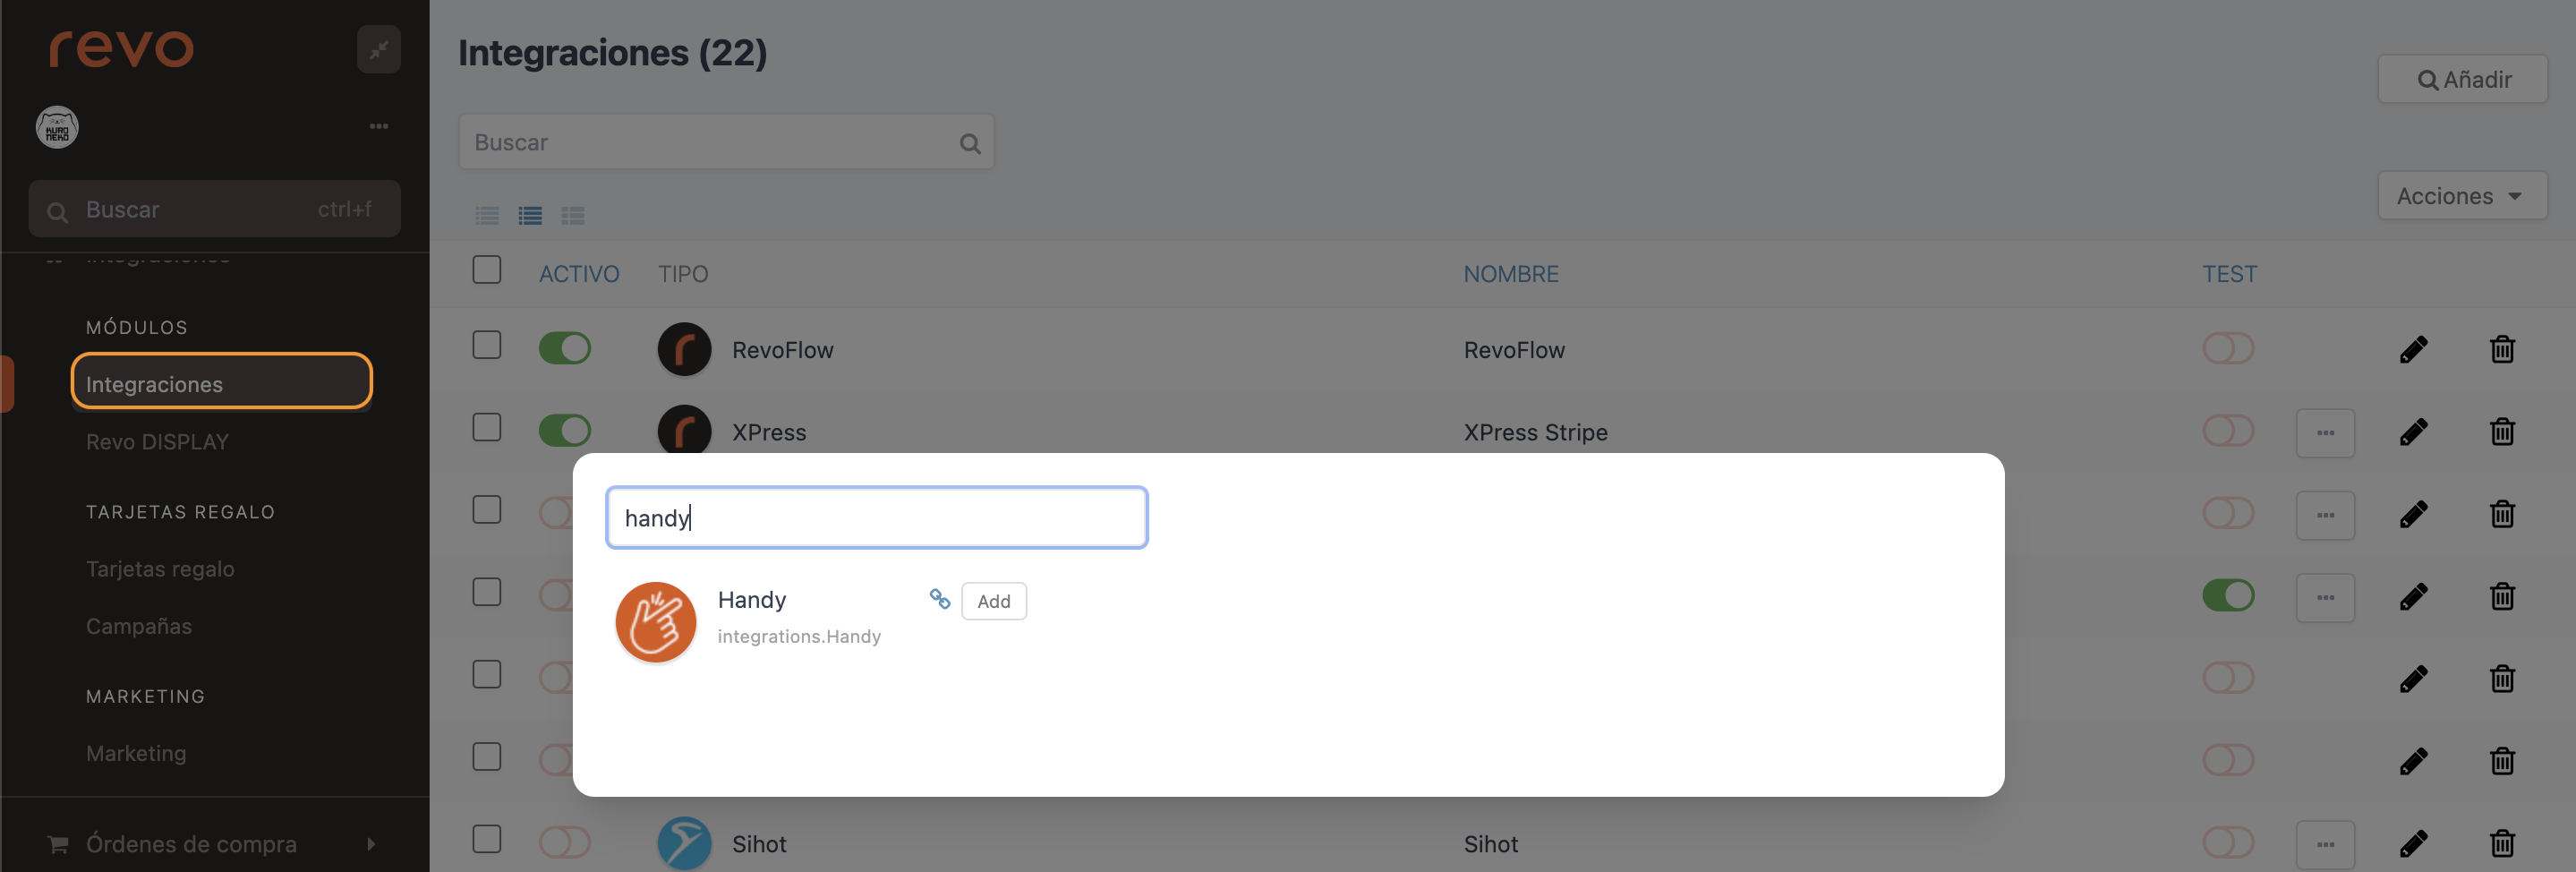
2. Click on Integrations.
3. From the Add button, search for Handy.
4. Click on Add to add the integration.
5. Fill in the following information:
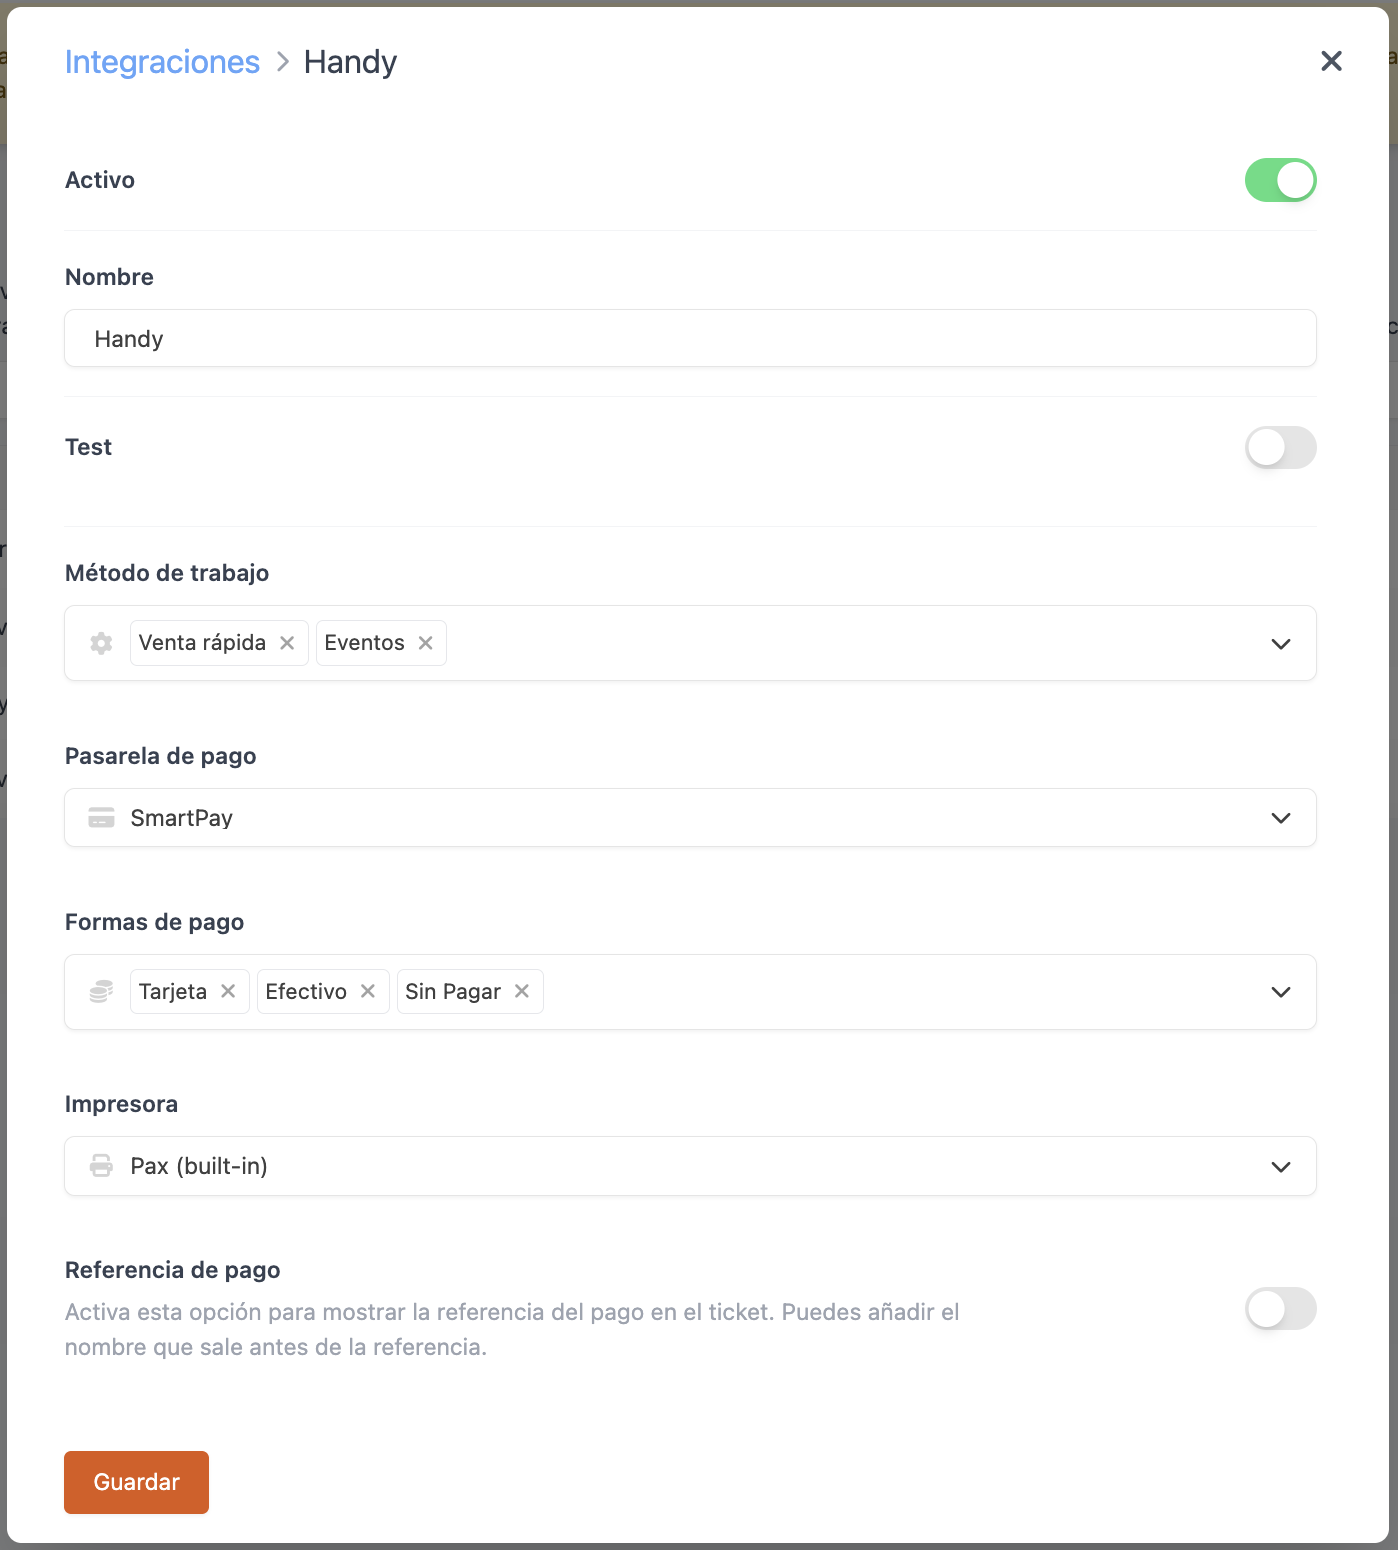
- Active:
- Name: Identifying name for the integration.
- Test: Disabled
- Work method: Select the work methods with which we want to work with the Revo HANDY app. We have two work methods: "Quick sale" and "Events".
Note: The Quick sale work method allows us to place orders quickly without being associated with any table.
Note: The Events work method, when activated in the REVO menu of the Revo HANDY app, allows us to work without requesting the employee PIN, even if we lock the terminal or it enters sleep mode. Additionally, it disables printing to the kitchen.
- Payment gateway: Select the payment gateway we will work with.
- Payment methods: Select the payment methods we want to work with in the Revo HANDY app.
Note: With this payment method configuration, we can work with different payment methods than those defined in Revo XEF.
- Printer: Select the type of printer we have.
- Payment reference: Activate if we want to automatically print the payment reference on invoices.
6. Click on Save.
FROM HERE ON, WE CAN PROPERLY WORK WITH THE REVO HANDY APP.
3. HOW DOES IT WORK?
1. Open tables and manage orders
Open tables, add products, and modify orders. Our entire product catalog from Revo XEF is also available on our Revo HANDY terminal.

2. Quick view
We always have all the information of each order at hand:

- Table number/name.
- Number of diners.
- Waiter who opened the account.
- Time the account was opened.
- Account reference.
- Products in the order.
- Account total.
3. Process payment and close the account from the same device
We process the payment and close the order in the Revo XEF software directly from Revo HANDY.
The payment screen allows us to:
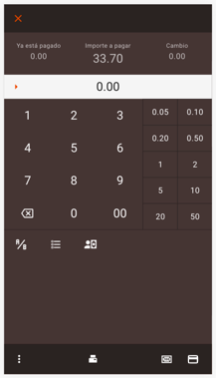
- Charge a card payment.
- Register a cash payment or other payment methods.
- Leave a tip.
- Split the bill (equally or by items).
4. Print tickets and receipts
We can use the same device to print both purchase tickets and receipts.

Note: For DOJO, you can use the DOJO POCKET V2 or DOJO DUO terminal to work with the Revo HANDY app. The DOJO DUO terminal has a built-in printer for printing tickets. The DOJO POCKET V2 does not have a built-in printer; therefore, to print tickets, it is necessary to connect an EPSON TM-M30 or STAR SM-S230i printer via Bluetooth to the terminal.
5. Also manage take-away orders
All Revo XEF orders are available on our Revo HANDY, even take-away orders.

6. The status of your restaurant, at a glance
Revo HANDY has two types of views that allow us to see the status of our restaurant and manage orders quickly.
Table map:
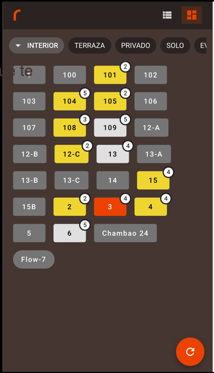
- Rooms.
- Tables with status colors.
- Number of diners.
- Button to synchronize open orders.
- List of open orders.
List of open orders:
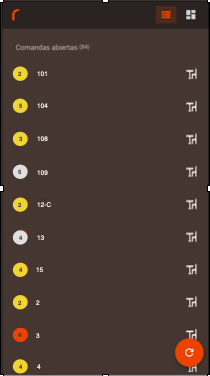
- Tables with status colors.
- Number of diners.
- Quick view to see the order.
- Button to synchronize open orders.
7. Revo HANDY Menu
Revo HANDY features a menu with different options. We can access it by pressing the r of REVO.
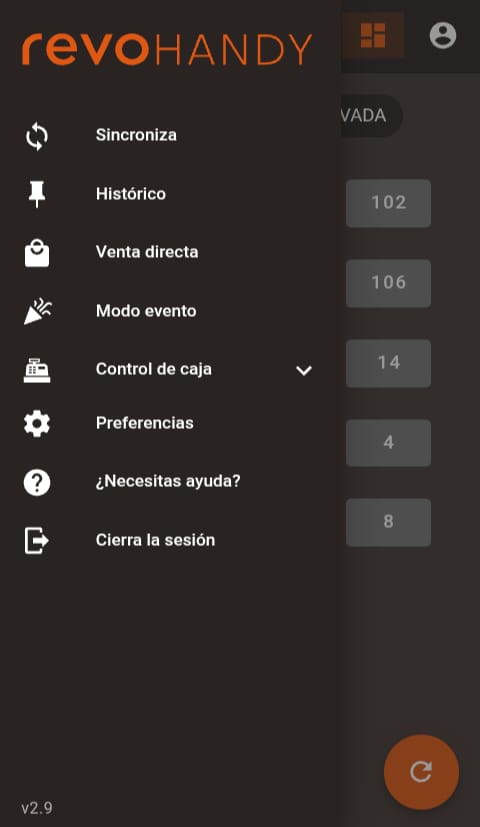
In this menu, we can view the following options:
- Synchronize: Synchronize back-office changes.
- History: Consult completed sales.
- Direct sale: Create POS order (order without an assigned table).
- Event mode: With this mode activated, we can work without being asked for the employee PIN, even if we lock the terminal or it enters sleep mode. Additionally, this mode disables printing to the kitchen.
Note: In order for the "Direct sale" and "Event mode" sections to be visible in the Revo HANDY app, it is necessary to configure these work methods in the Revo XEF back-office integration.
- Cash control: Cash management options. More information below.
- Preferences: Configuration options. More information below.
- Need help?: Revo HANDY app support options. More information below.
- Log out: Close Revo HANDY app session.
7.1 History
In this section, we can consult the sales generated today or any other day. In addition, we can also make refunds.

7.2 Cash control
Within the Cash control section, we can find the following options:
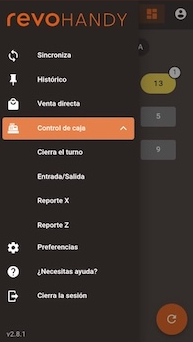
- Open shift/Close shift: Open or close a shift.
- Cash in/Cash out: Make a cash deposit or withdrawal.
- X Report: View and/or print the X report (Shift summary).
- Z Report: View and/or print the Z report (Summary of all shifts for the day).
7.3 Preferences
In this section, we find different settings:
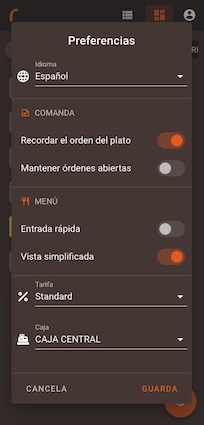
- Language: Modify the language of the Revo HANDY app.
- Order - Remember dish order: Remember the dish order after sending a product to the kitchen in an order.
- Order - Keep orders open: Keep orders open after cashing out an order.
- Menu - Quick entry: Ask for the number of diners when selecting a menu.
- Menu - Simplified view: Do not see menu details.
- Tariff: Select the price or percentage tariff we want to use in the Revo HANDY app. If we do not change the tariff, the Revo HANDY app will use the default tariff, i.e., the standard tariff.
- Cashier: Select the cashier we want to work with in the Revo HANDY app.
7.4 Need help?
In this section, we will find two options that will help us resolve any questions related to the Revo HANDY app.
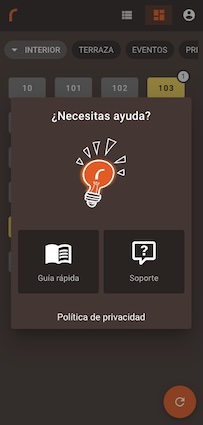
- Quick guide: View the quick guide to help understand the basic operation of the Revo HANDY app.
- Support: View the Revo HANDY support article.
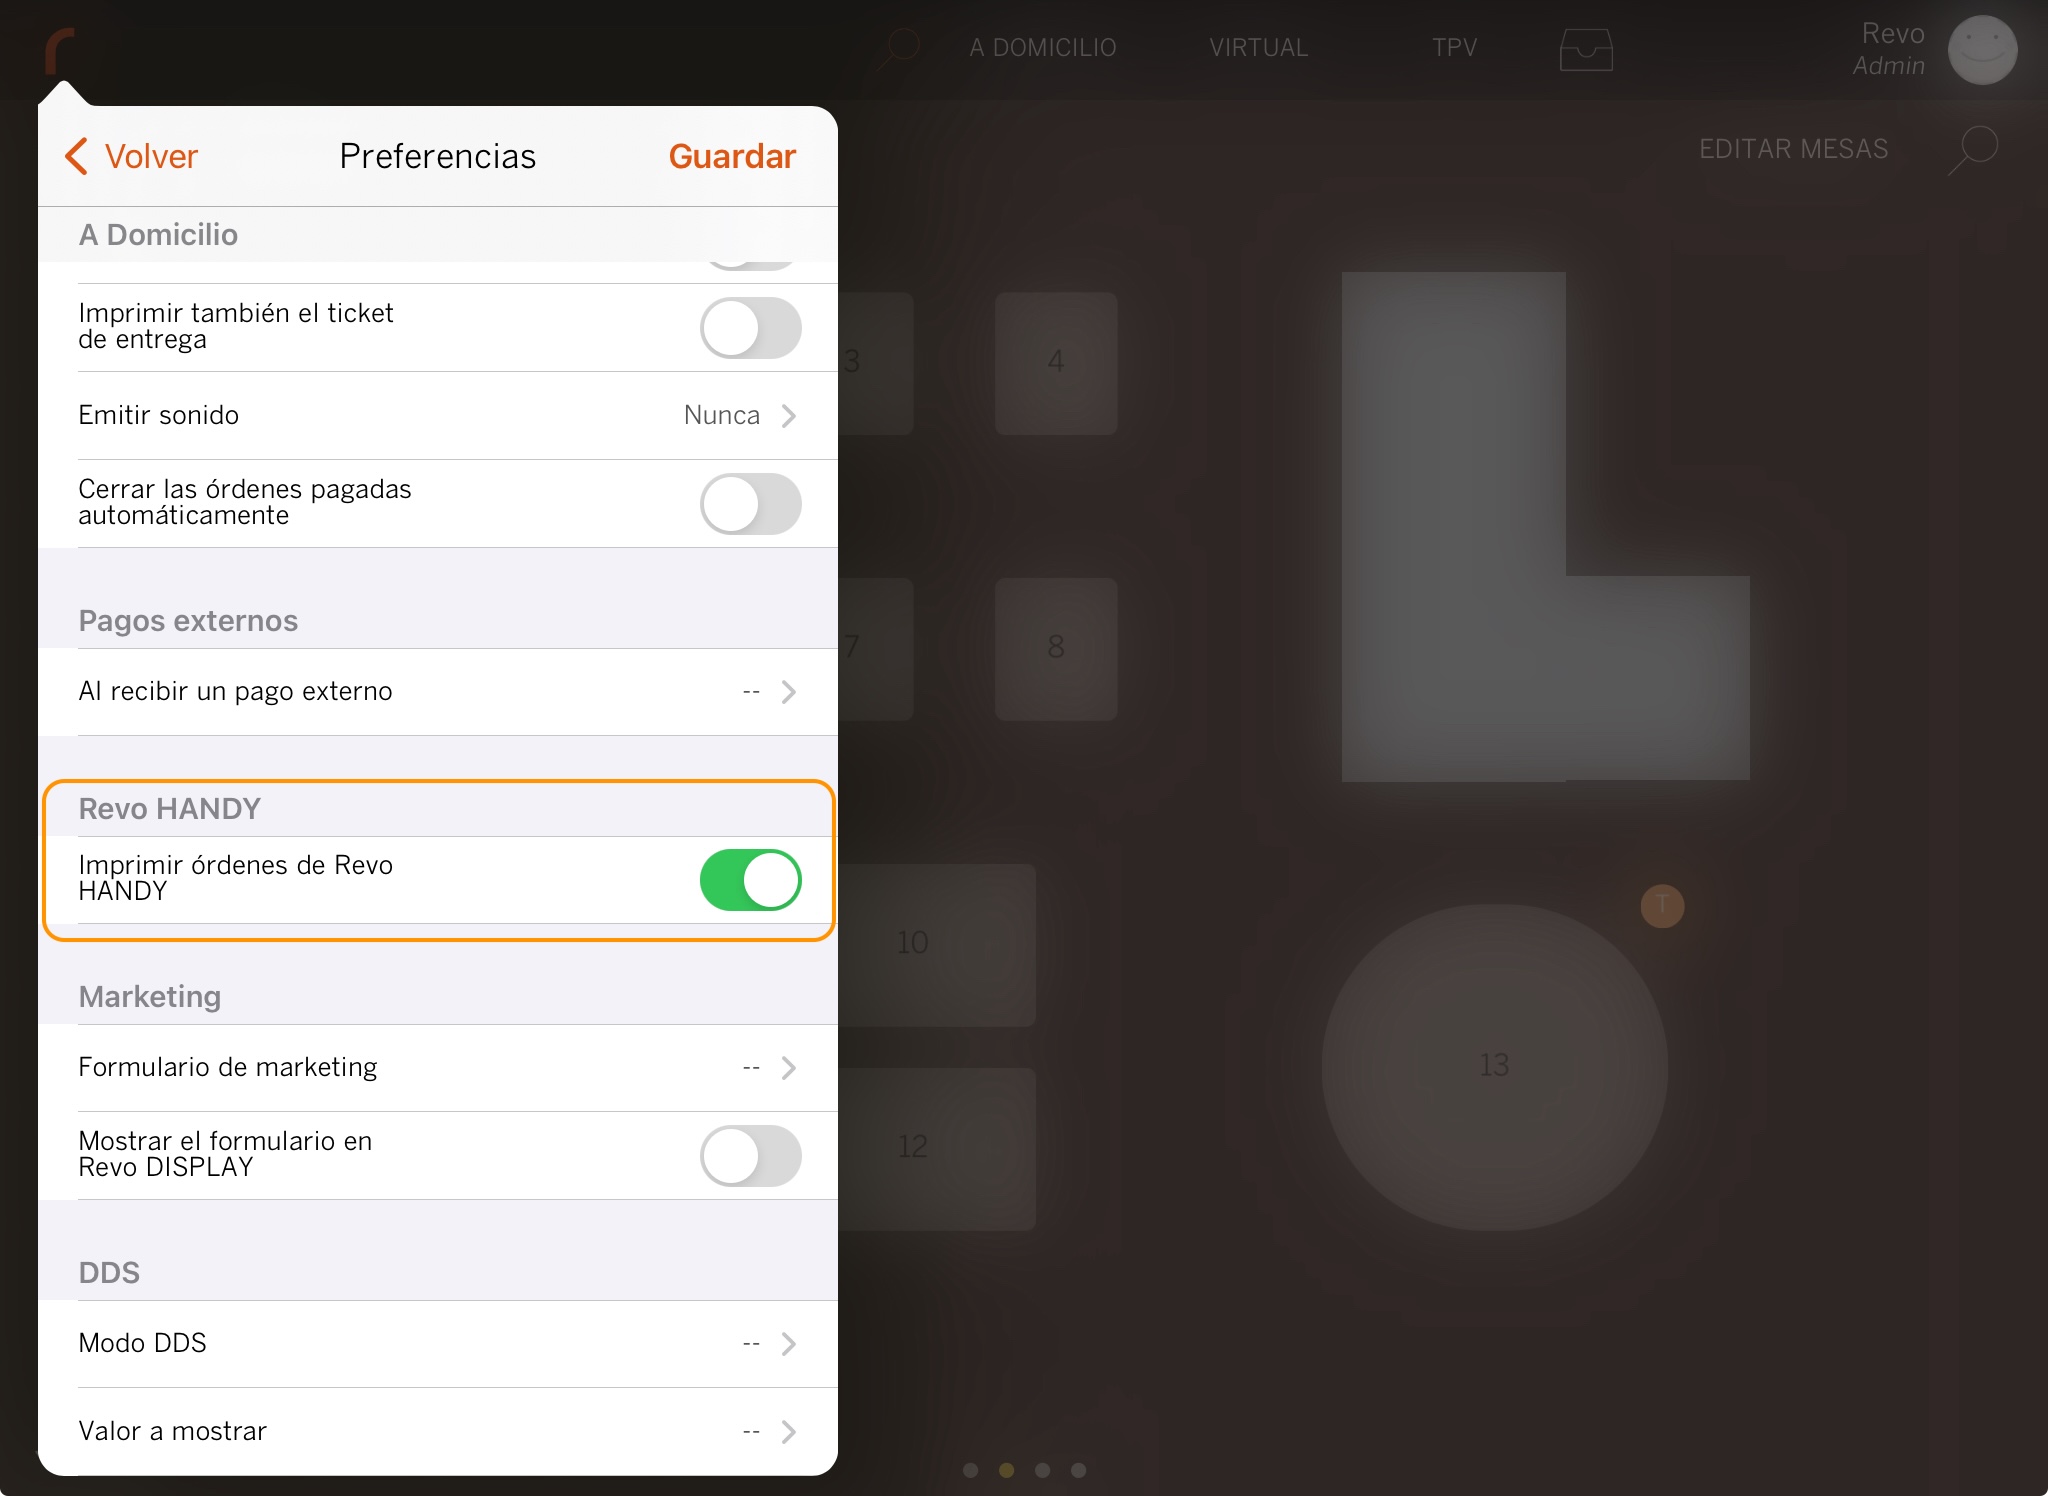
4. PRINT TO KITCHEN WITH REVO HANDY
To print orders created in Revo HANDY correctly in the kitchen, we must have the Print Revo HANDY orders option enabled in the Preferences section of the REVO menu in the Revo XEF app.
IMPORTANT: Products must have a dish order assigned; otherwise, they will not be sent to the kitchen. If it is not created, you must create it and assign it by doing the following in the back-office:
1. Go to Configuration > Dish order.
2. Create or modify an order by setting Automatic print type to Yes.
3. Assign this order to your products.
5. HOW TO MAKE REFUNDS OF ORDERS MADE IN REVO HANDY
We can refund cash orders with any bank integration. Regarding card order refunds, for now, we can only do it with the following banks:
- DOJO and BBVA (Smartpay)
DOJO AND BBVA (SMARTPAY)
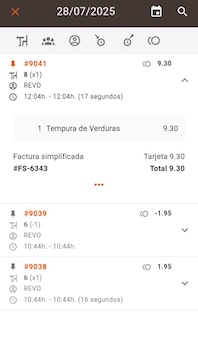
1. Go to the REVO "r" and click on "History".
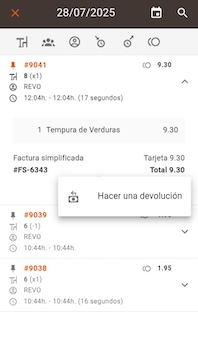
2. Select the order and click on the three dots.
3. Click on "Make a refund".
4. Select the invoice and click "OK".
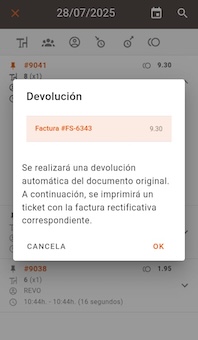
The bank app will automatically open to process the refund and finalize it correctly.
COMERCIA (CAIXABANK)
We can process Comercia CaixaBank refunds using the Revo XEF app. We must have the Redsys Pinpad integration activated and configured. Revo XEF needs this integration to communicate with the payment terminal to issue the refund to the customer's bank/card.
If we do not have the Redsys Pinpad integration created in the back-office and we try to issue a refund in Revo XEF for an order made with Revo HANDY, the refund will be completed correctly in the Revo XEF app, but the money will not have been returned to the bank. Therefore, the customer will have to issue the refund manually via the payment terminal using the bank app.
6. POSSIBLE ERRORS AND HOW TO FIX THEM
| Problem | Message / Cause | Solution |
|---|---|---|
| Why don't products from handy print in the kitchen? | Missing dish order or automatic configuration disabled. | Verify that the product has a dish order assigned. In the back-office, go to Configuration > Dish order and check that the "Automatic print type" is set to Yes. |
| Message at login: Device not active | The device is not active and the device limit on the account has been reached. (Remember that Revo HANDY acts as an additional Revo XEF device). |  Check your licenses and active devices. Check your licenses and active devices. |
| Message at login: Incorrect user or password | Credentials were not entered correctly. |  Enter the access data correctly again. Enter the access data correctly again. |
| Connectivity error: Data could not be sent or received, check Internet connection | The device has no Internet connection. |  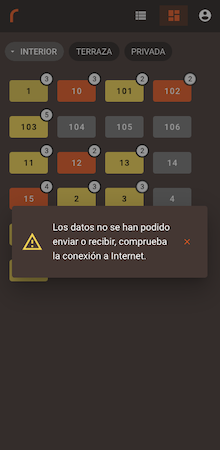 Check the device's internet connections. Check the device's internet connections. |
| App closes when paying | The Smartpay (BBVA) or SmartPOSComercia (CaixaBank) payment app is not installed or correctly configured on the payment terminal. | When pressing the card icon, the payment app should automatically open to process the charge. Make sure you have the bank app installed and configured. |
Revo HANDY App locked:
1. First of all, we close the Revo HANDY app from the background applications and reopen it.
2. Once the Revo HANDY app is open, we double-tap on the version number (e.g., "v2.1.1") (in the bottom right corner).
3. The Debug Mode screen will appear. We must ensure that Server is set to Production and tap on SAVE. This will "reset" the app.
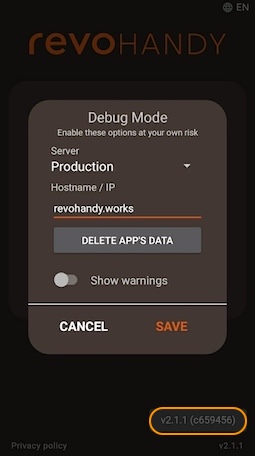
4. We log in again.
If the above steps do not work, close the app again, reopen it, and navigate to the same screen, but instead of pressing SAVE, press DELETE APP’S DATA.
If none of the above worked, restart the device.