Here we'll explain how the Google form works to configure the specifications of the loyalty plus plan.
IMPORTANT: To fill out the form, you need to have a Google email address.
1. GENERAL INFORMATION 2. LOYALTY TYPE 2.1 POINTS ACCUMULATION 2.2 STAMP CARD 3. WELCOME GIFT 4. LOYALTY GIFT 5. PROGRAM LEVELS 6. ADVANCED CAMPAIGN
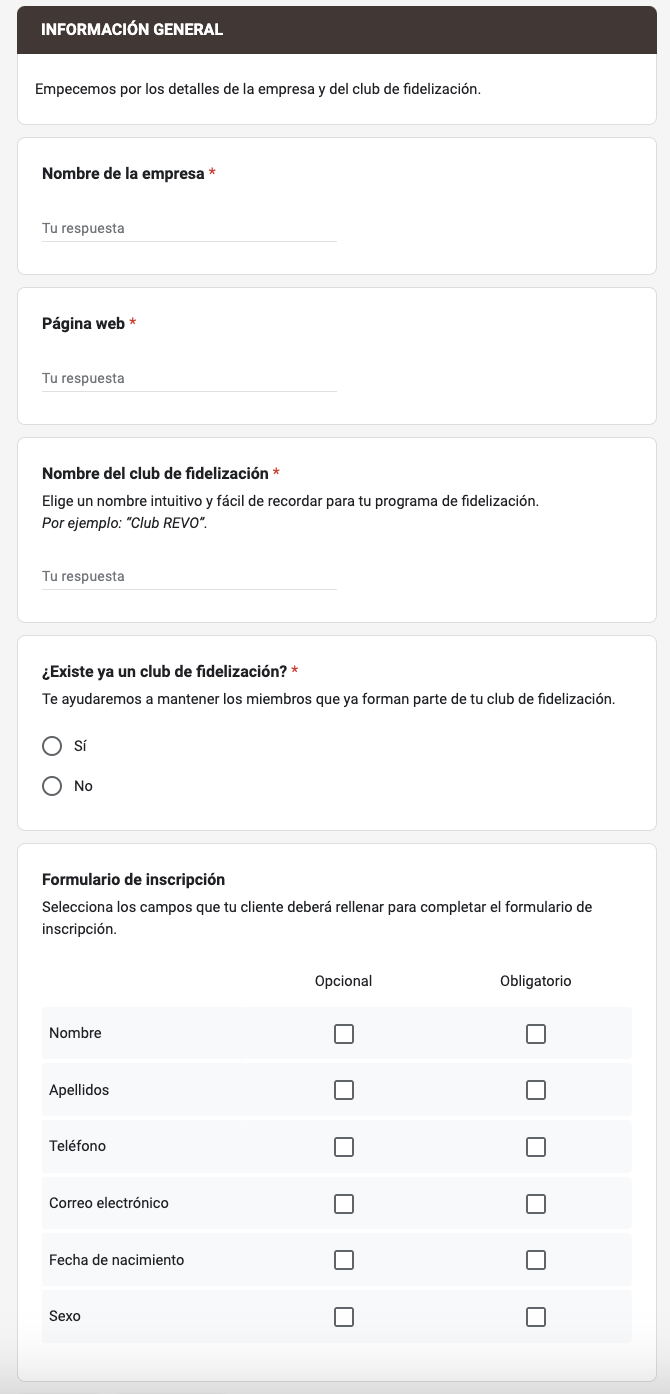
1. GENERAL INFORMATION
Here we need to provide details about our company and information about the loyalty club.
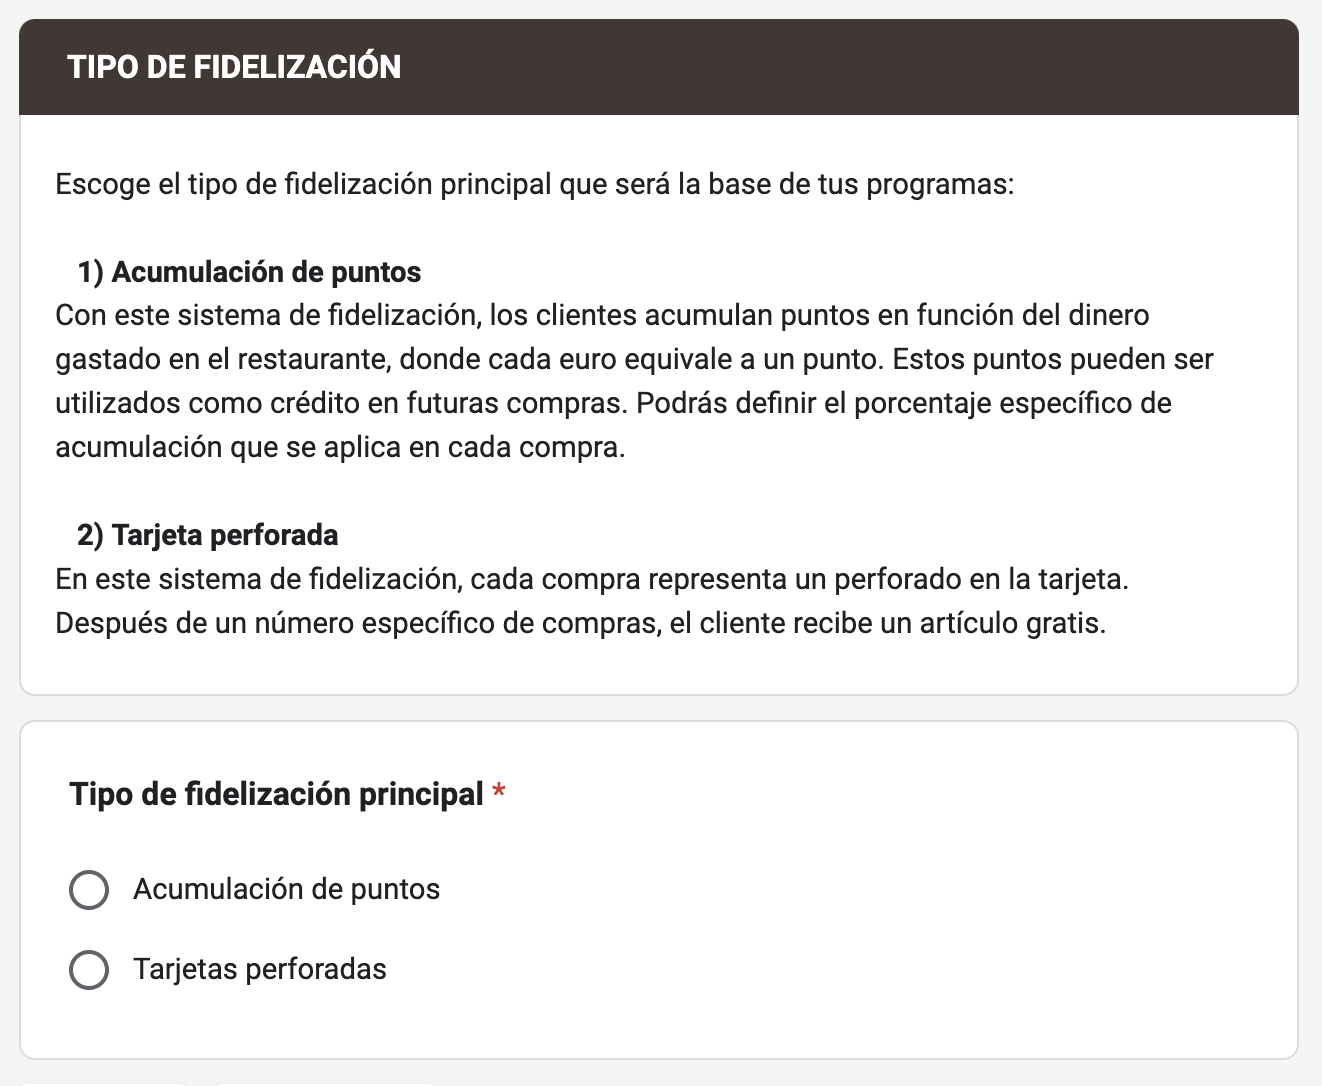
2. LOYALTY TYPE
We choose the main loyalty type, which will be the basis of our programs:
1. Points Accumulation
With this loyalty system, customers accumulate points based on money spent in the restaurant, where each euro equals one point. These points can be used as credit for future purchases. We can define the specific accumulation percentage applied to each purchase.
2. Stamp Card
In this loyalty system, each purchase represents a stamp on the card. After a specific number of purchases, the customer receives a free item.
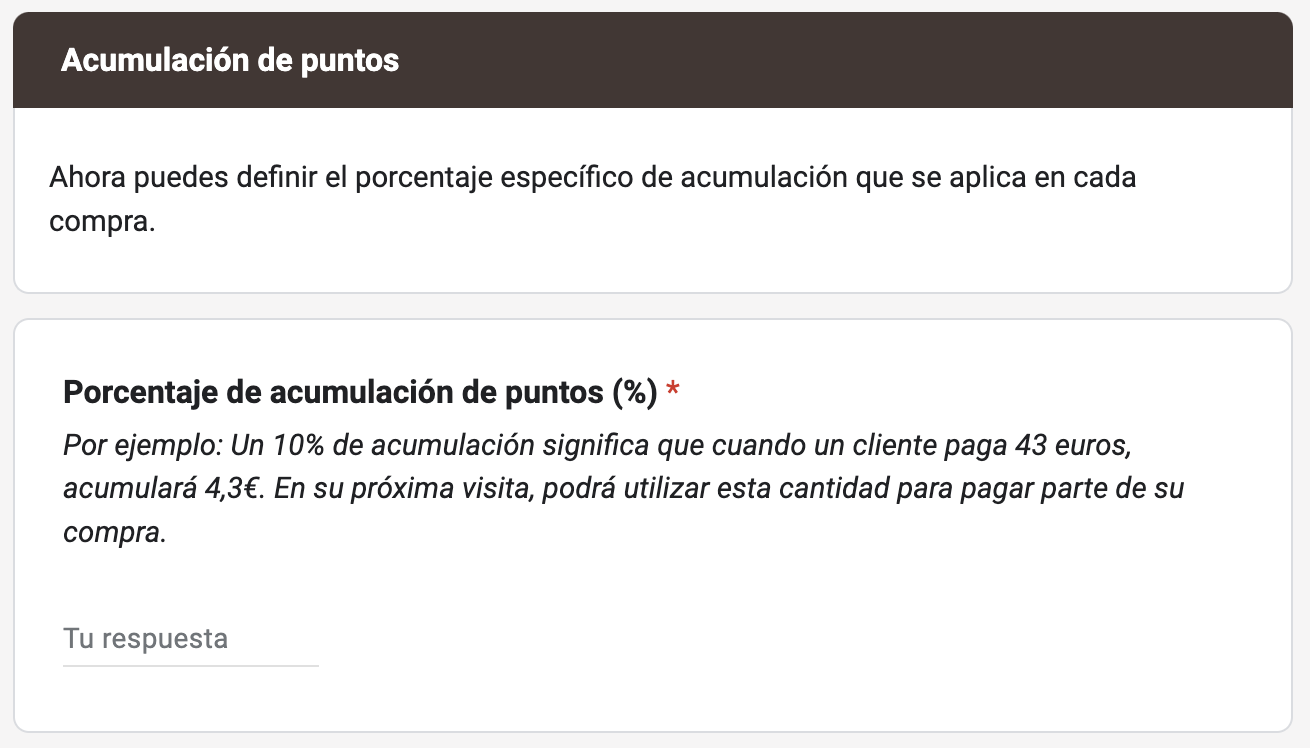
2.1 POINTS ACCUMULATION
We'll need to indicate the percentage of points accumulation (%).
For example: A 10% accumulation means that when a customer pays 43 euros, they will accumulate €4.3. On their next visit, they can use this amount to pay part of their purchase.
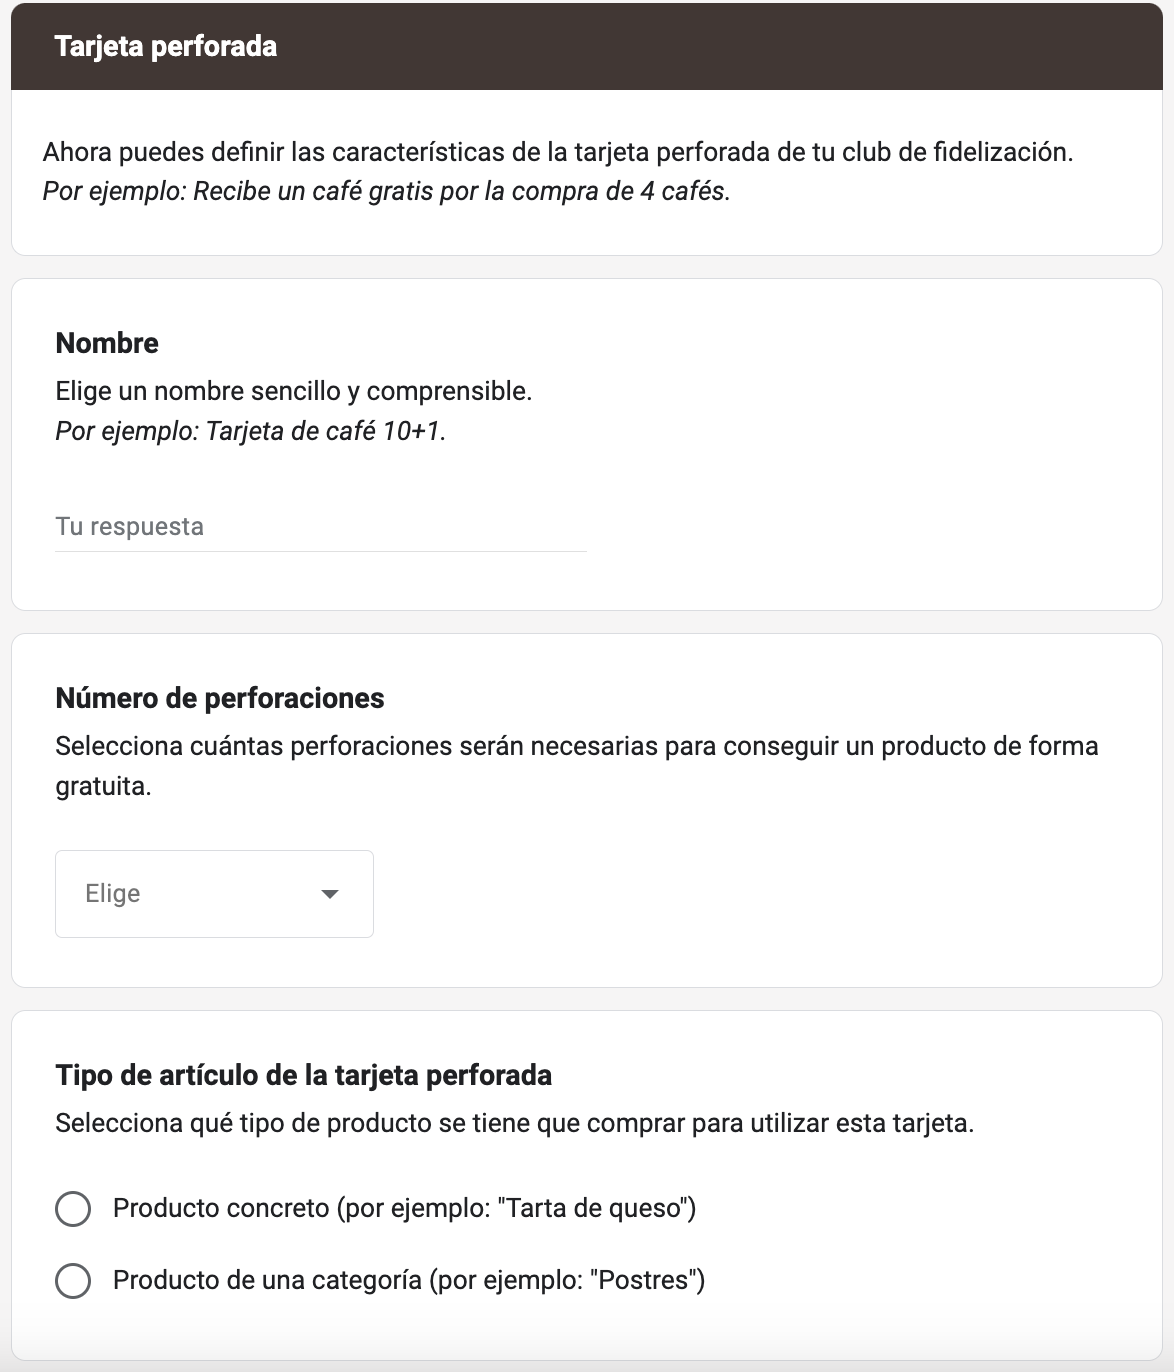
2.2 STAMP CARD
In this loyalty system, each purchase represents a hole in your card. After a specified number of purchases, the customer receives a free item.
If you have selected the punch card as the primary loyalty, configure it by answering these questions:
-
Name: Choose a simple and understandable name. For example: Coffee Card 10+1.
-
Number of Stamps: Select how many stamps will be needed to get a product for free. We can add from 6 to 10 stamps.
-
Type of item for the stamp card: We have two options: By product or category.
-
If we select product, we need to enter the product ID. We can get the ID by hovering over the product in the Revo XEF back office, it will appear in the bottom left corner.
-
If we select category, we need to enter the category ID. We can get the ID by hovering over the category in the Revo XEF back office, it will appear in the bottom left corner.
-
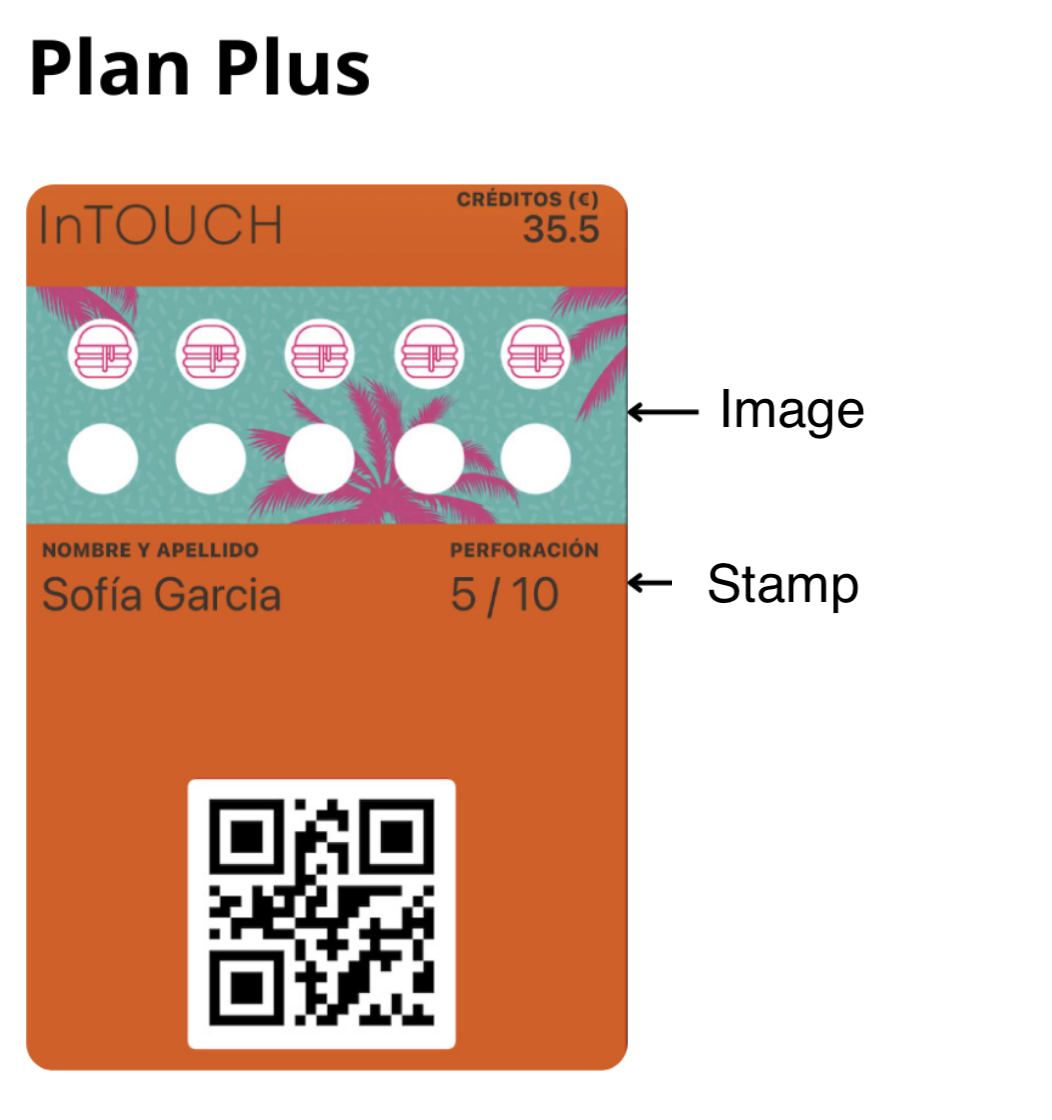
IMPORTANT: With the Basic Plan, the Wallet Pass shows only the number of punches. The Plus Plan allows you to add images.
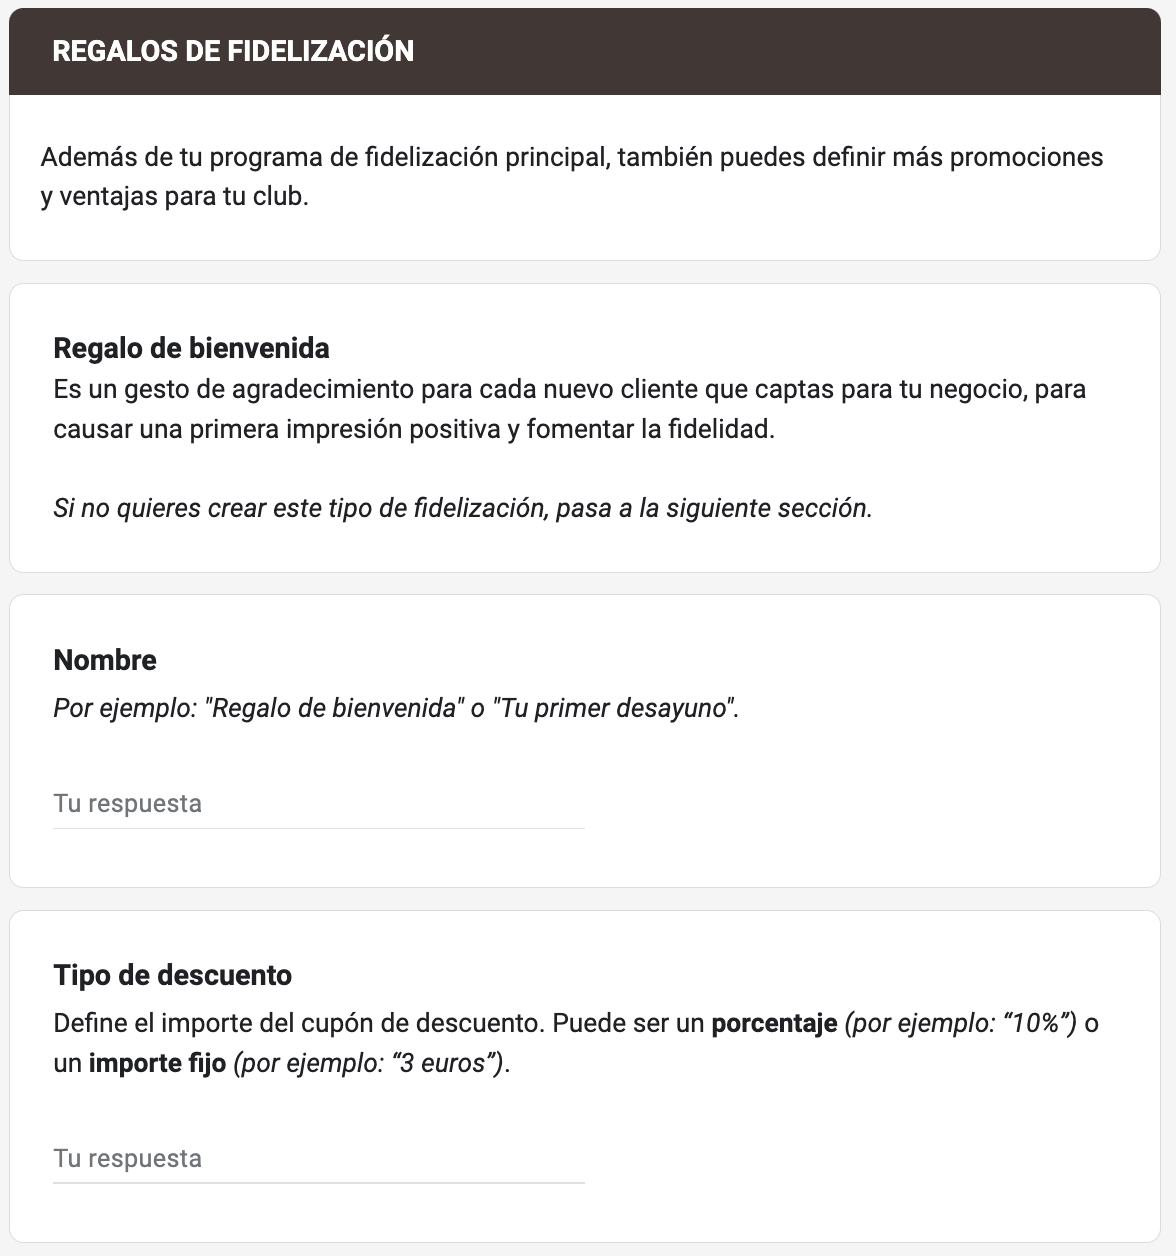
5. WELCOME GIFT
In this section, we can configure the welcome gift to give to customers when they register. This section is optional; if we don't want to give a welcome gift, simply click Next.
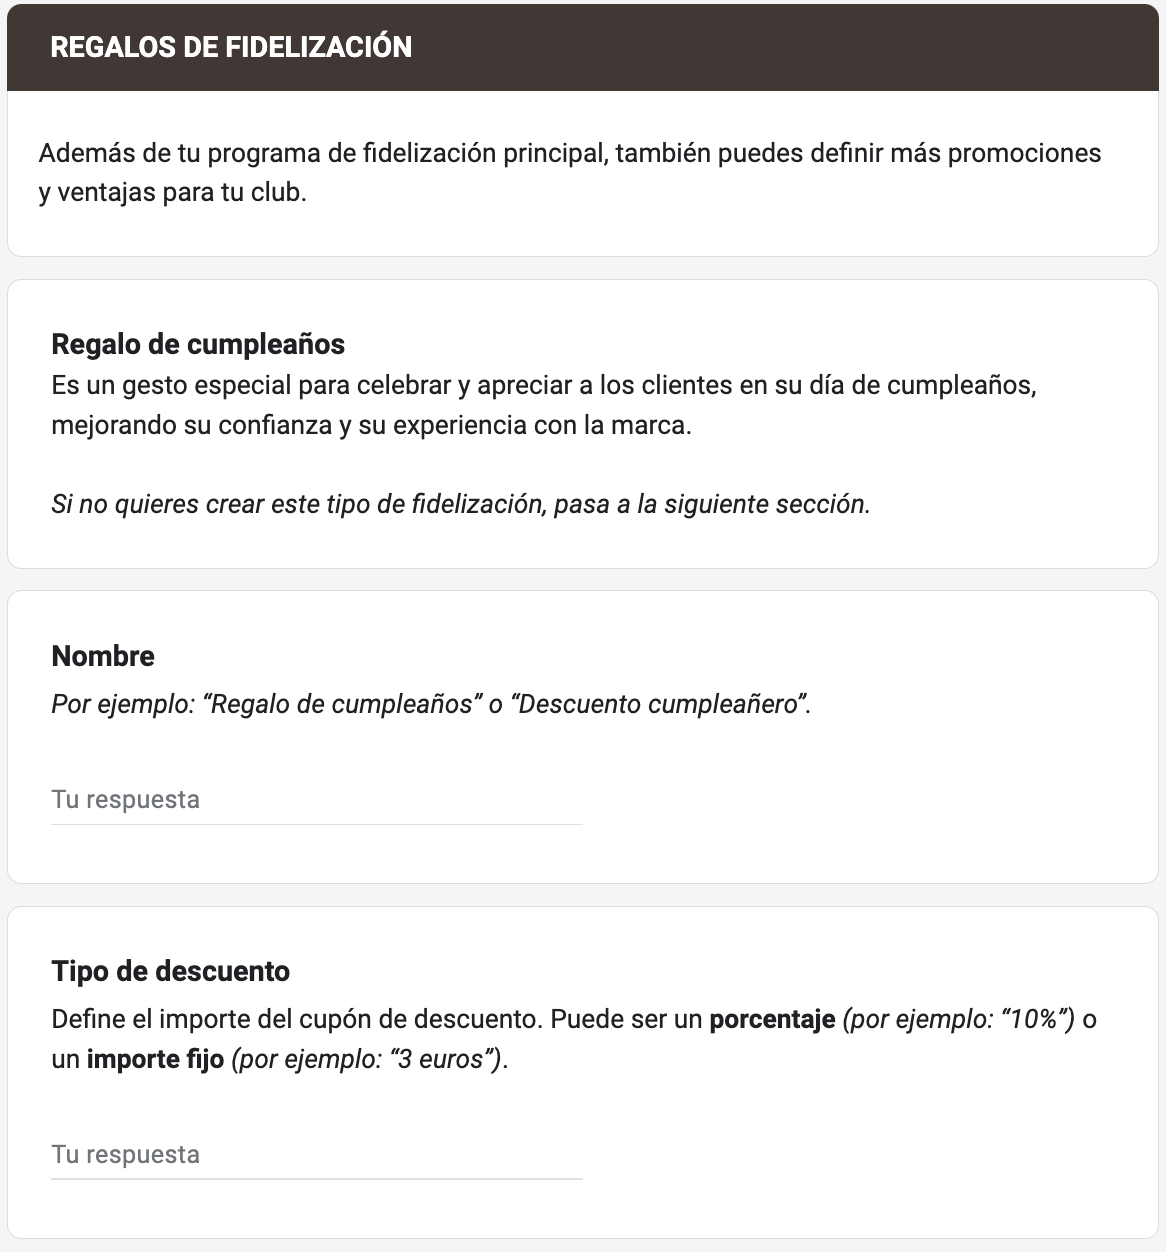
6. LOYALTY GIFT
In this section, we can configure a loyalty gift, for example, giving the customer a gift for their birthday. This section is optional; simply click Next to continue with the form.
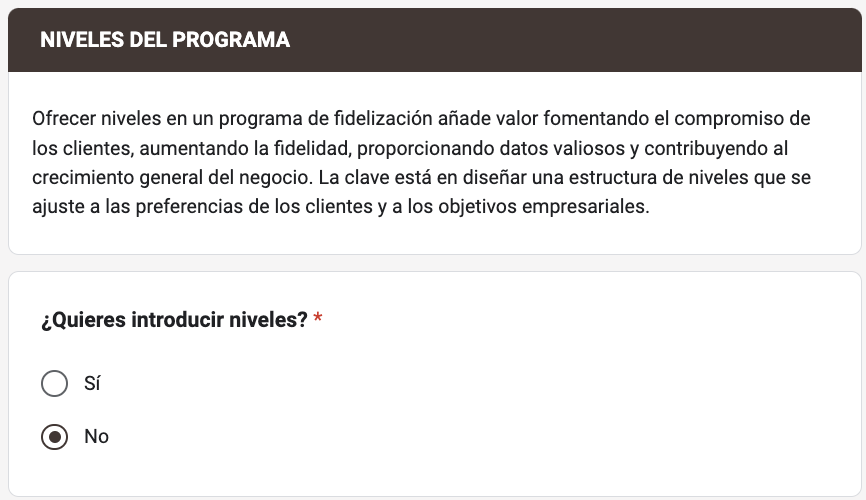
5. PROGRAM LEVELS
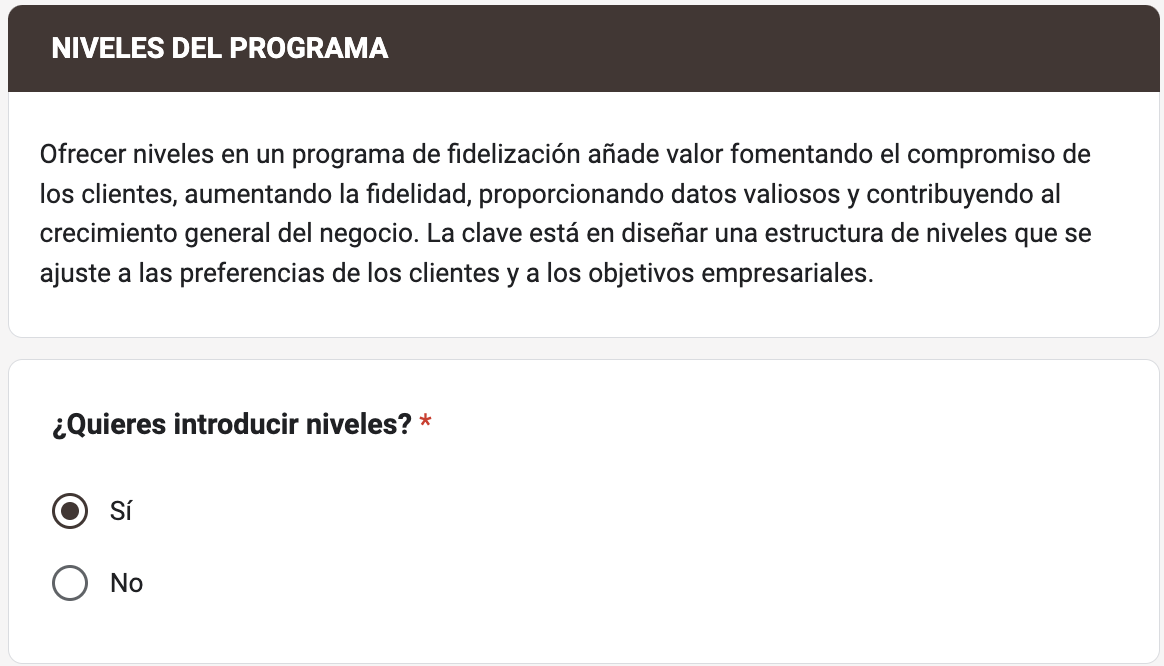
Finally, configure the program levels if you wish. If you do not want to offer this option, select No and press Next.
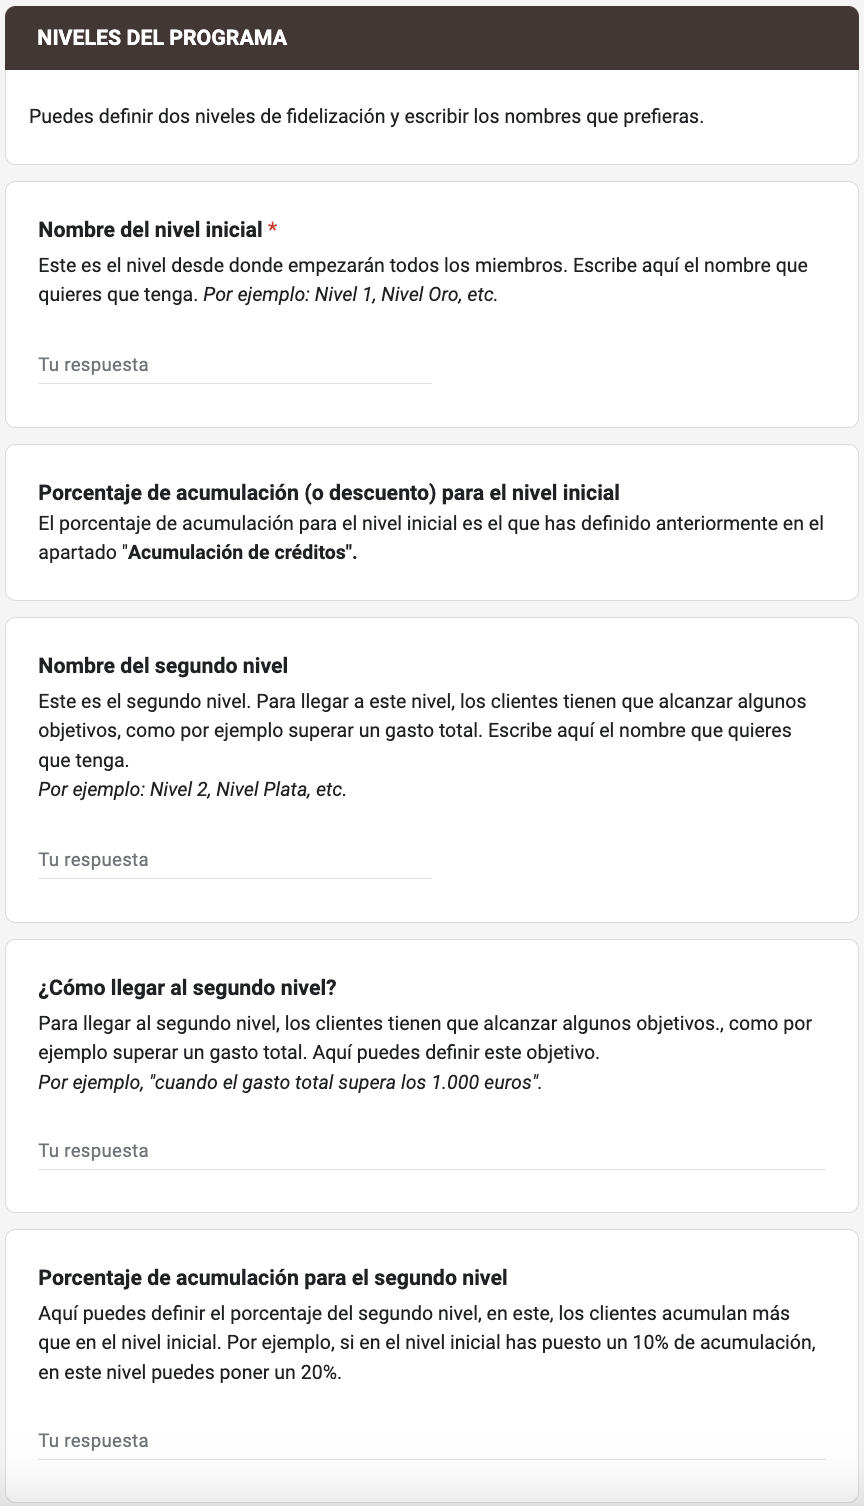
If you want to have Levels, select Yes and press Next.
Now you can configure
6. ADVANCED CAMPAIGN
Recovery of "lost customers".
In this campaign we can configure the promotion to recover customers who have been inactive for a long time and send them a discount.
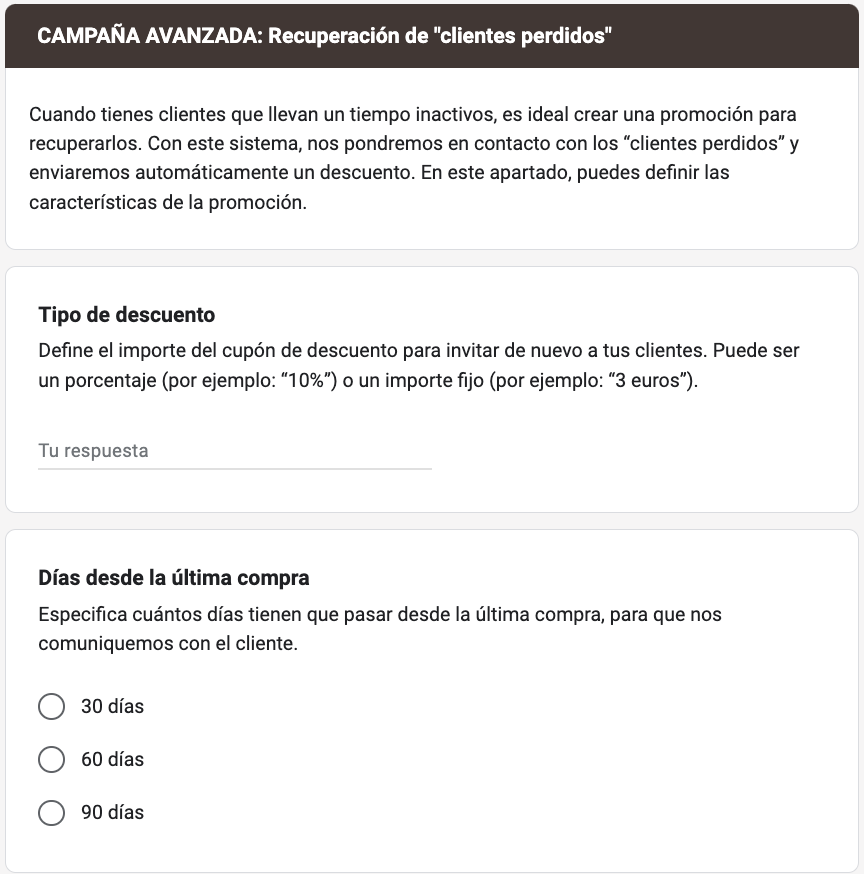
Configure the options, press Next and Submit to finish the process.