1. OVERVIEW 2. CREATE A NEW BANNER 3. PRACTICAL EXAMPLES
You can create different banners to add to the carousel on the homepage of the Revo SOLO web app.
1. OVERVIEW
1. Access the back-office of Revo SOLO.
2. Go to Marketing / BANNERS.
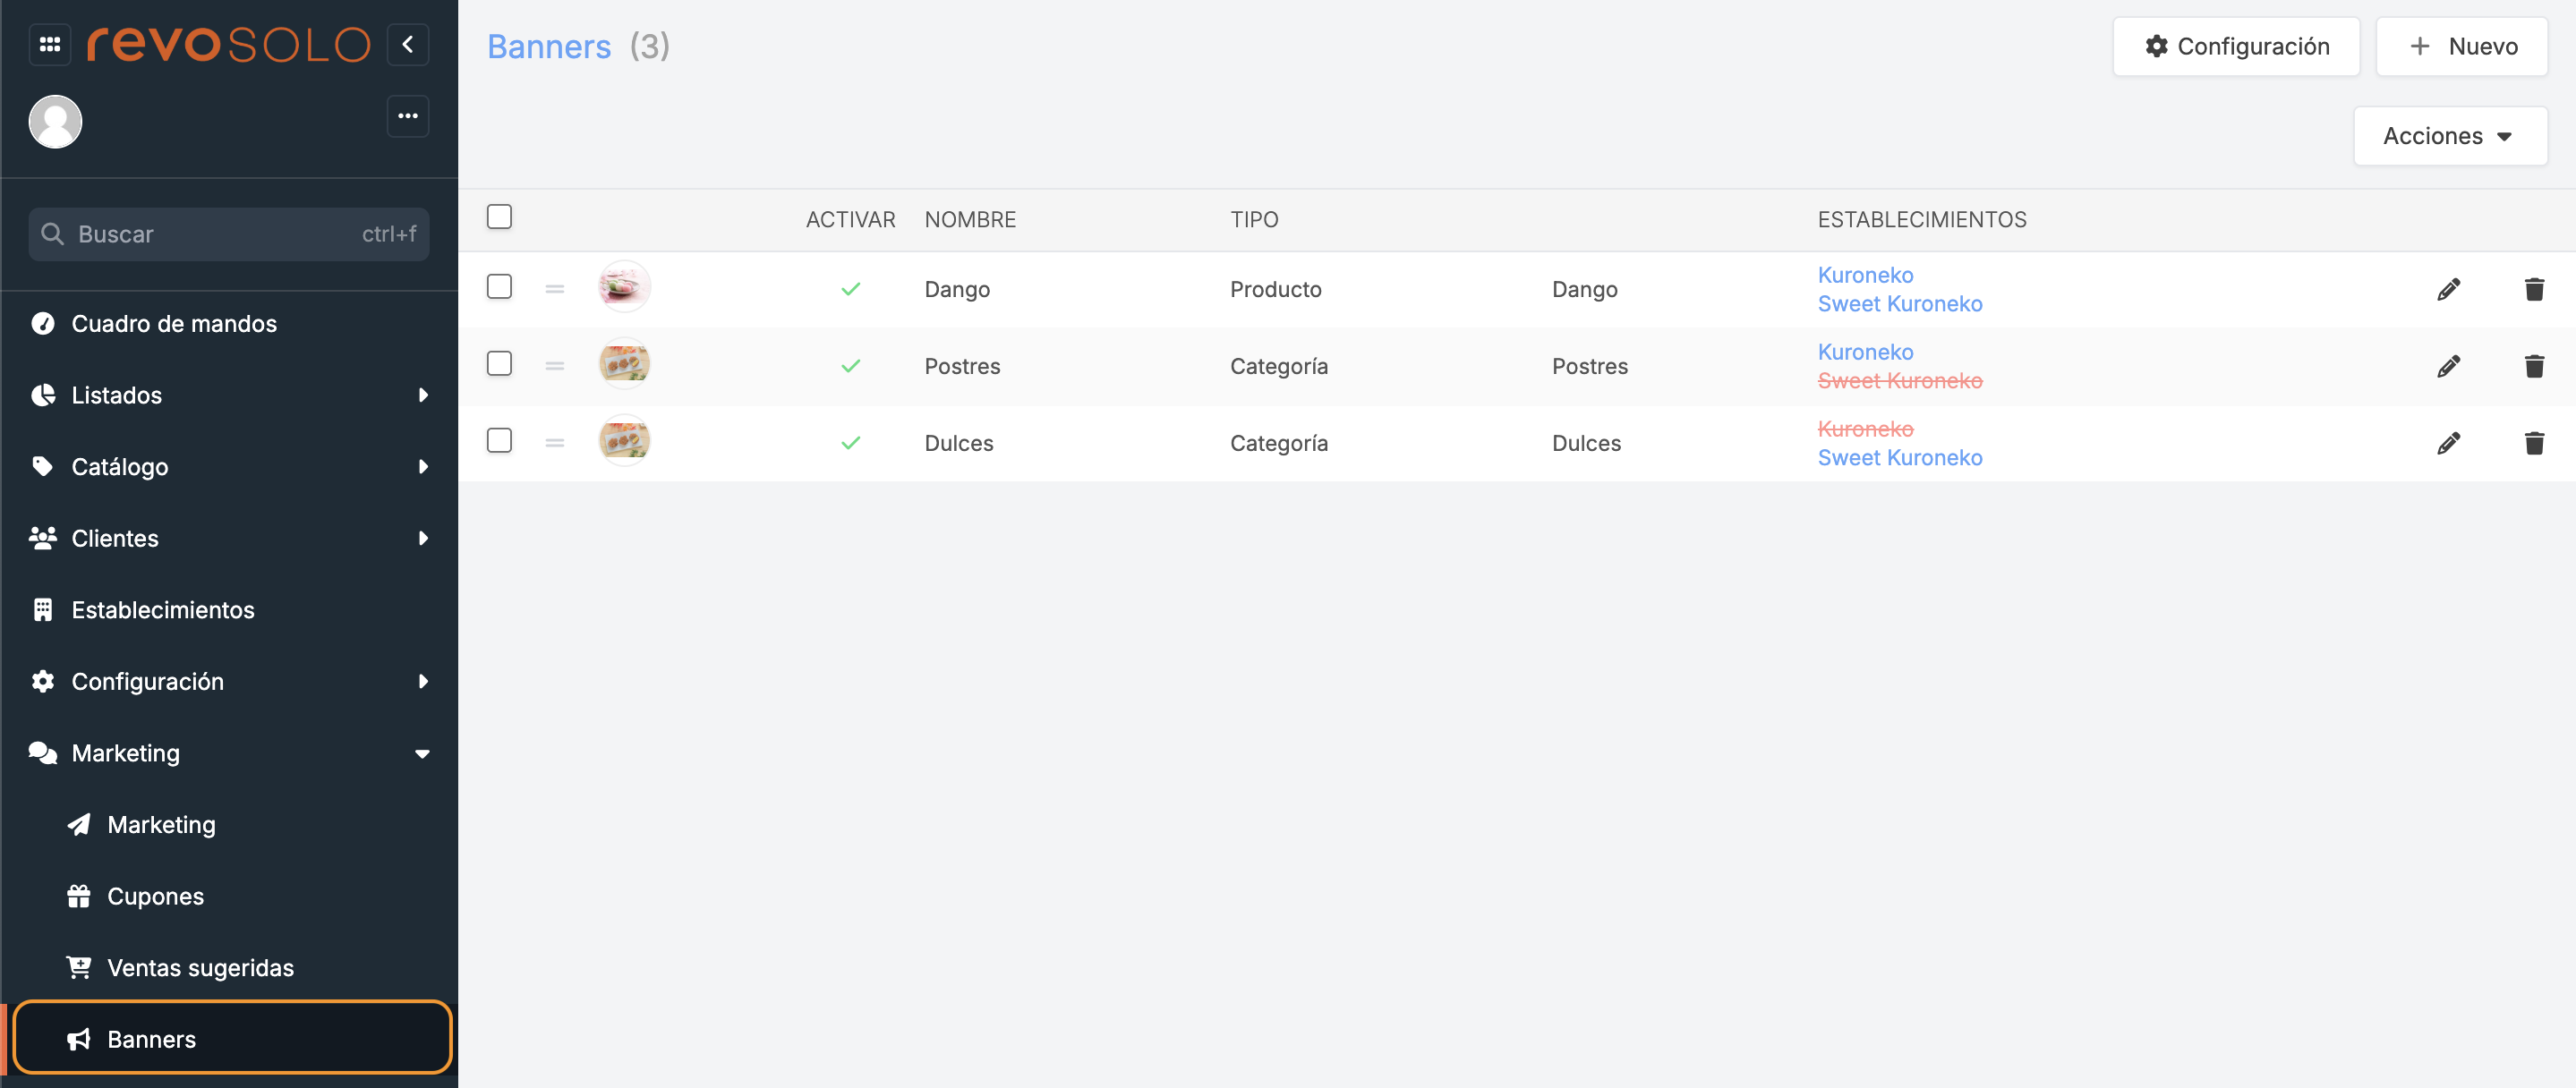
-
Save order: Save the order of the banners after arranging them.
-
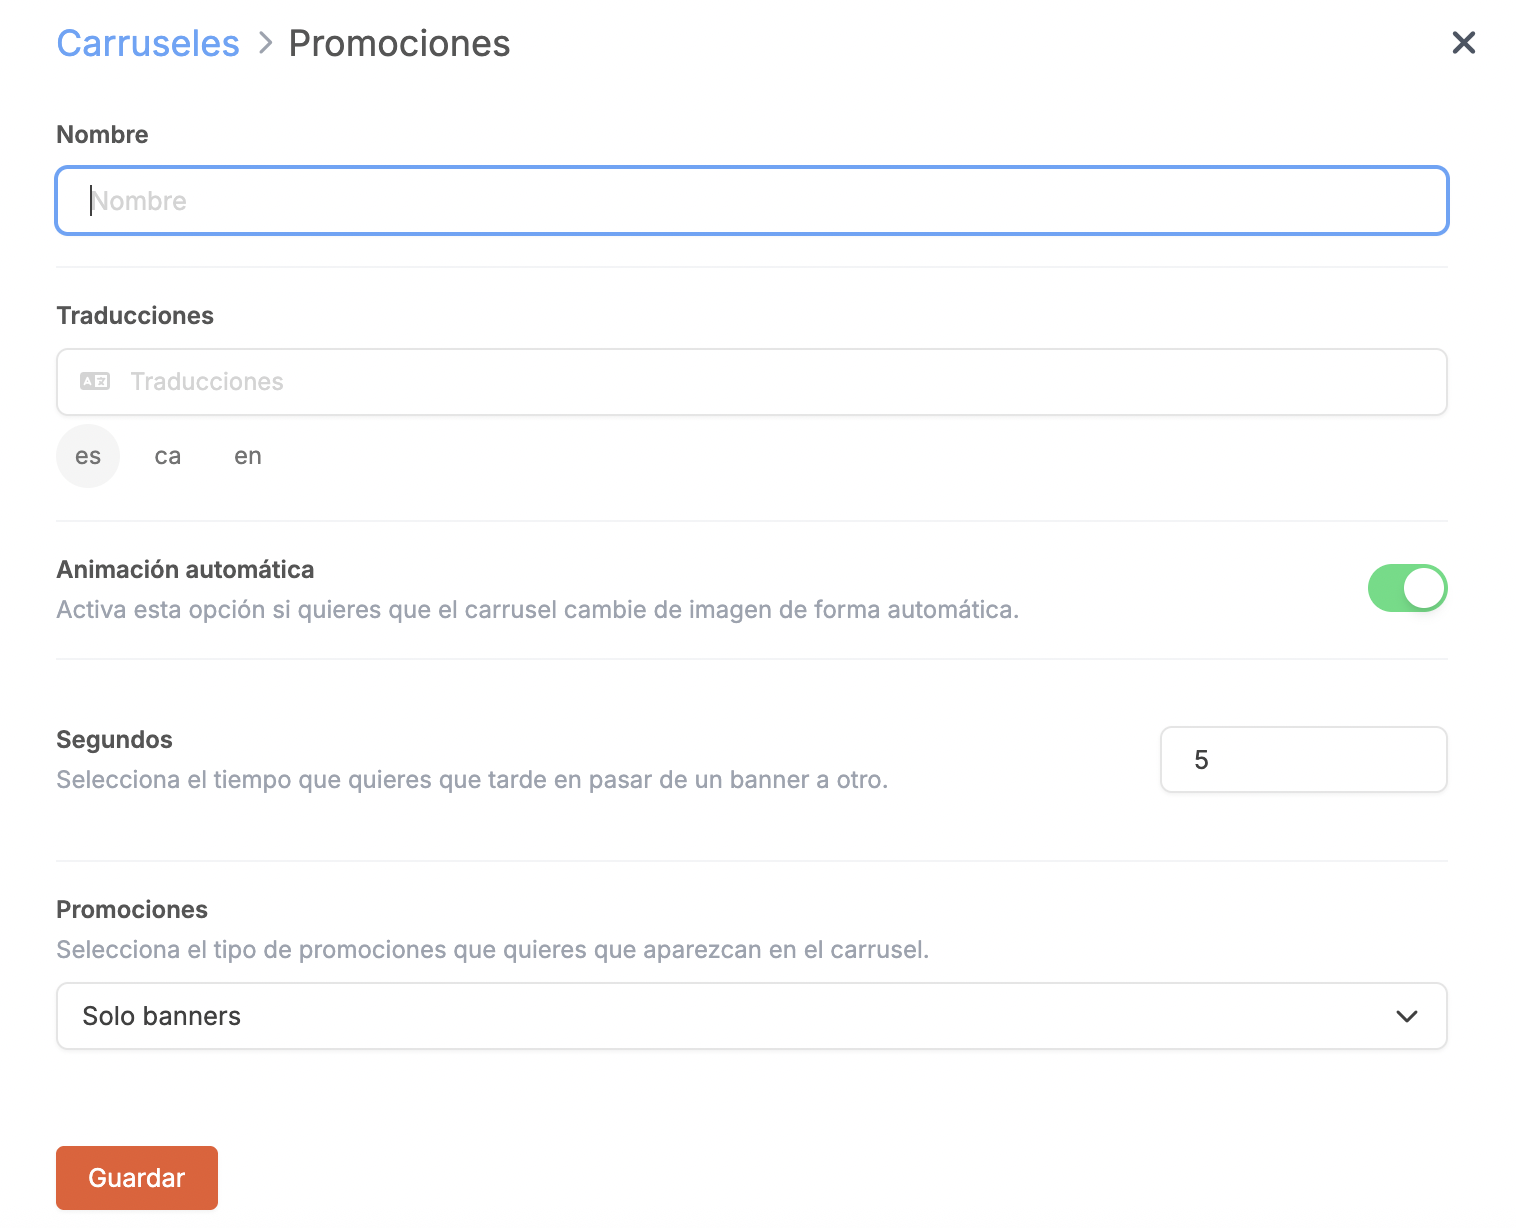
Configuration: Configure the carousel.
-
Name: Name for the carousel. It will be visible in the web app.
-
Translations: Enter the name in the different languages.
-
Automatic animation: Activate this option if you want the carousel to change images automatically.
-
Seconds: Select how long you want each banner to display before switching.
-
Promotions: Select the type of promotions you want to display in the carousel.
- Banners only: Only the banners you create.
- InTOUCH only: Only promotions created in InTOUCH.
- Banners then InTOUCH: First the banners you create, then the promotions from InTOUCH.
- InTOUCH then banners: First the promotions from InTOUCH, then the banners you create.
-
Banners and InTOUCH randomly: Banners and promotions will appear in random order.
-
-
+ New: Create a new banner.
-
Actions: Delete one or several selected banners.
-
: Select the banners.
-
: Drag the banner to a new position.
-
: Add an image or GIF to the banner.
-
: Deactivate the banner. To activate it, click the .
-
Name: Banner name.
-
Type: Type of banner.
-
Establishments: Shows which establishment is using the banner.
-
: Edit the banner.
-
: Delete the banner.
2. CREATE A NEW BANNER
1. Click + New and fill in the information.

-
Activate:
-
Name: Add a descriptive name.
-
Translations: Write the translation in the language you have configured.
-
Information translations: Enter here the information in any of the languages you have configured.
-
Type: Choose between product, category, or URL.
This step will vary depending on the type you choose.
- Product/Category/URL: Select the product to appear on the banner, the category, or enter a URL.
2. Click Save.
3. PRACTICAL EXAMPLES
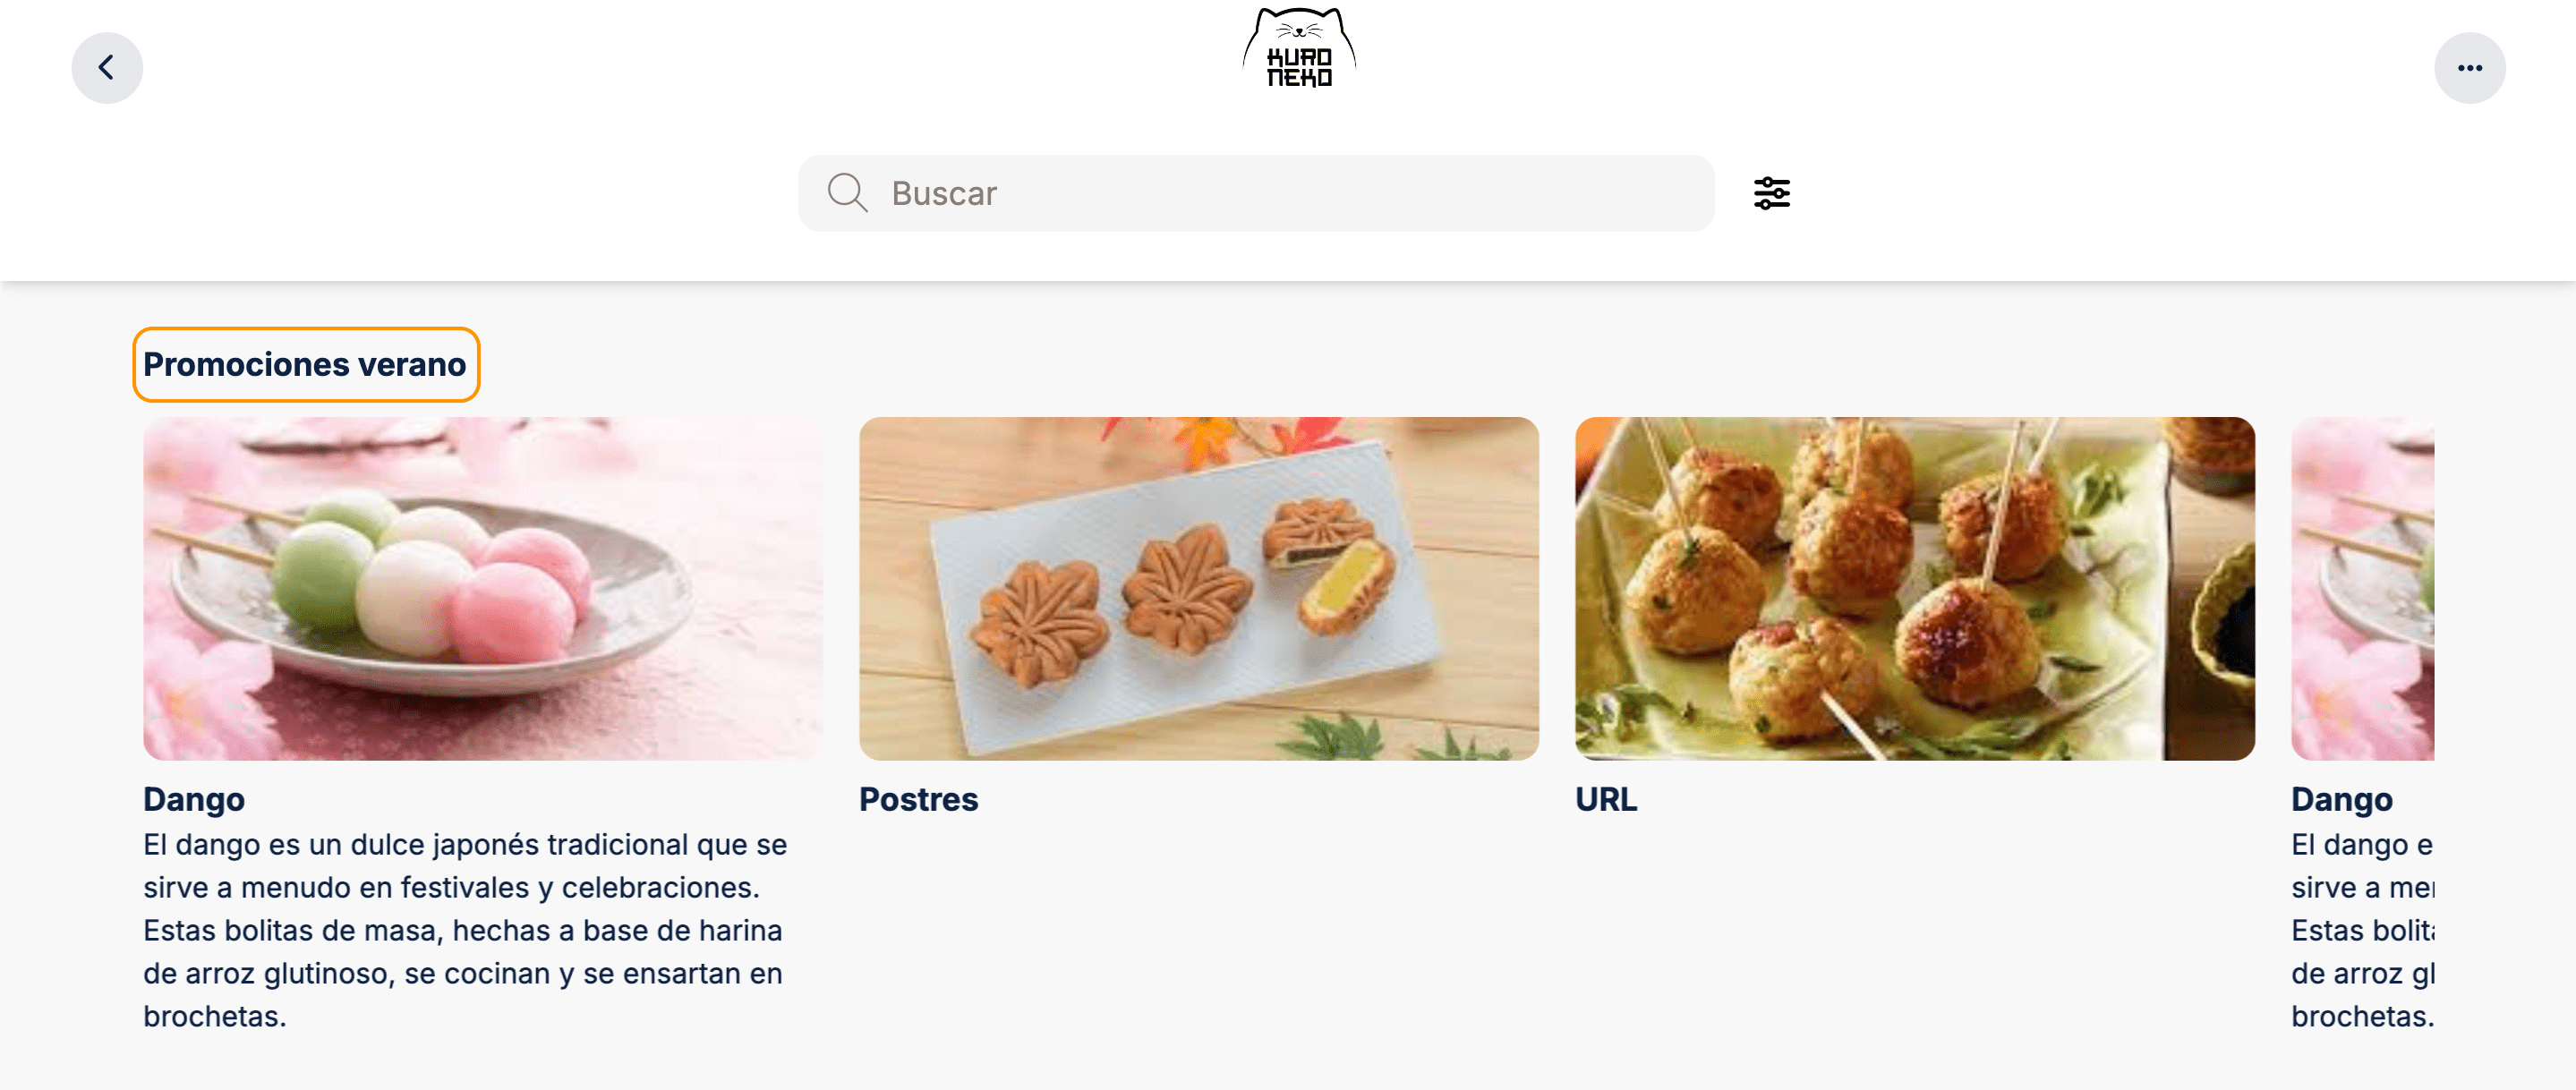
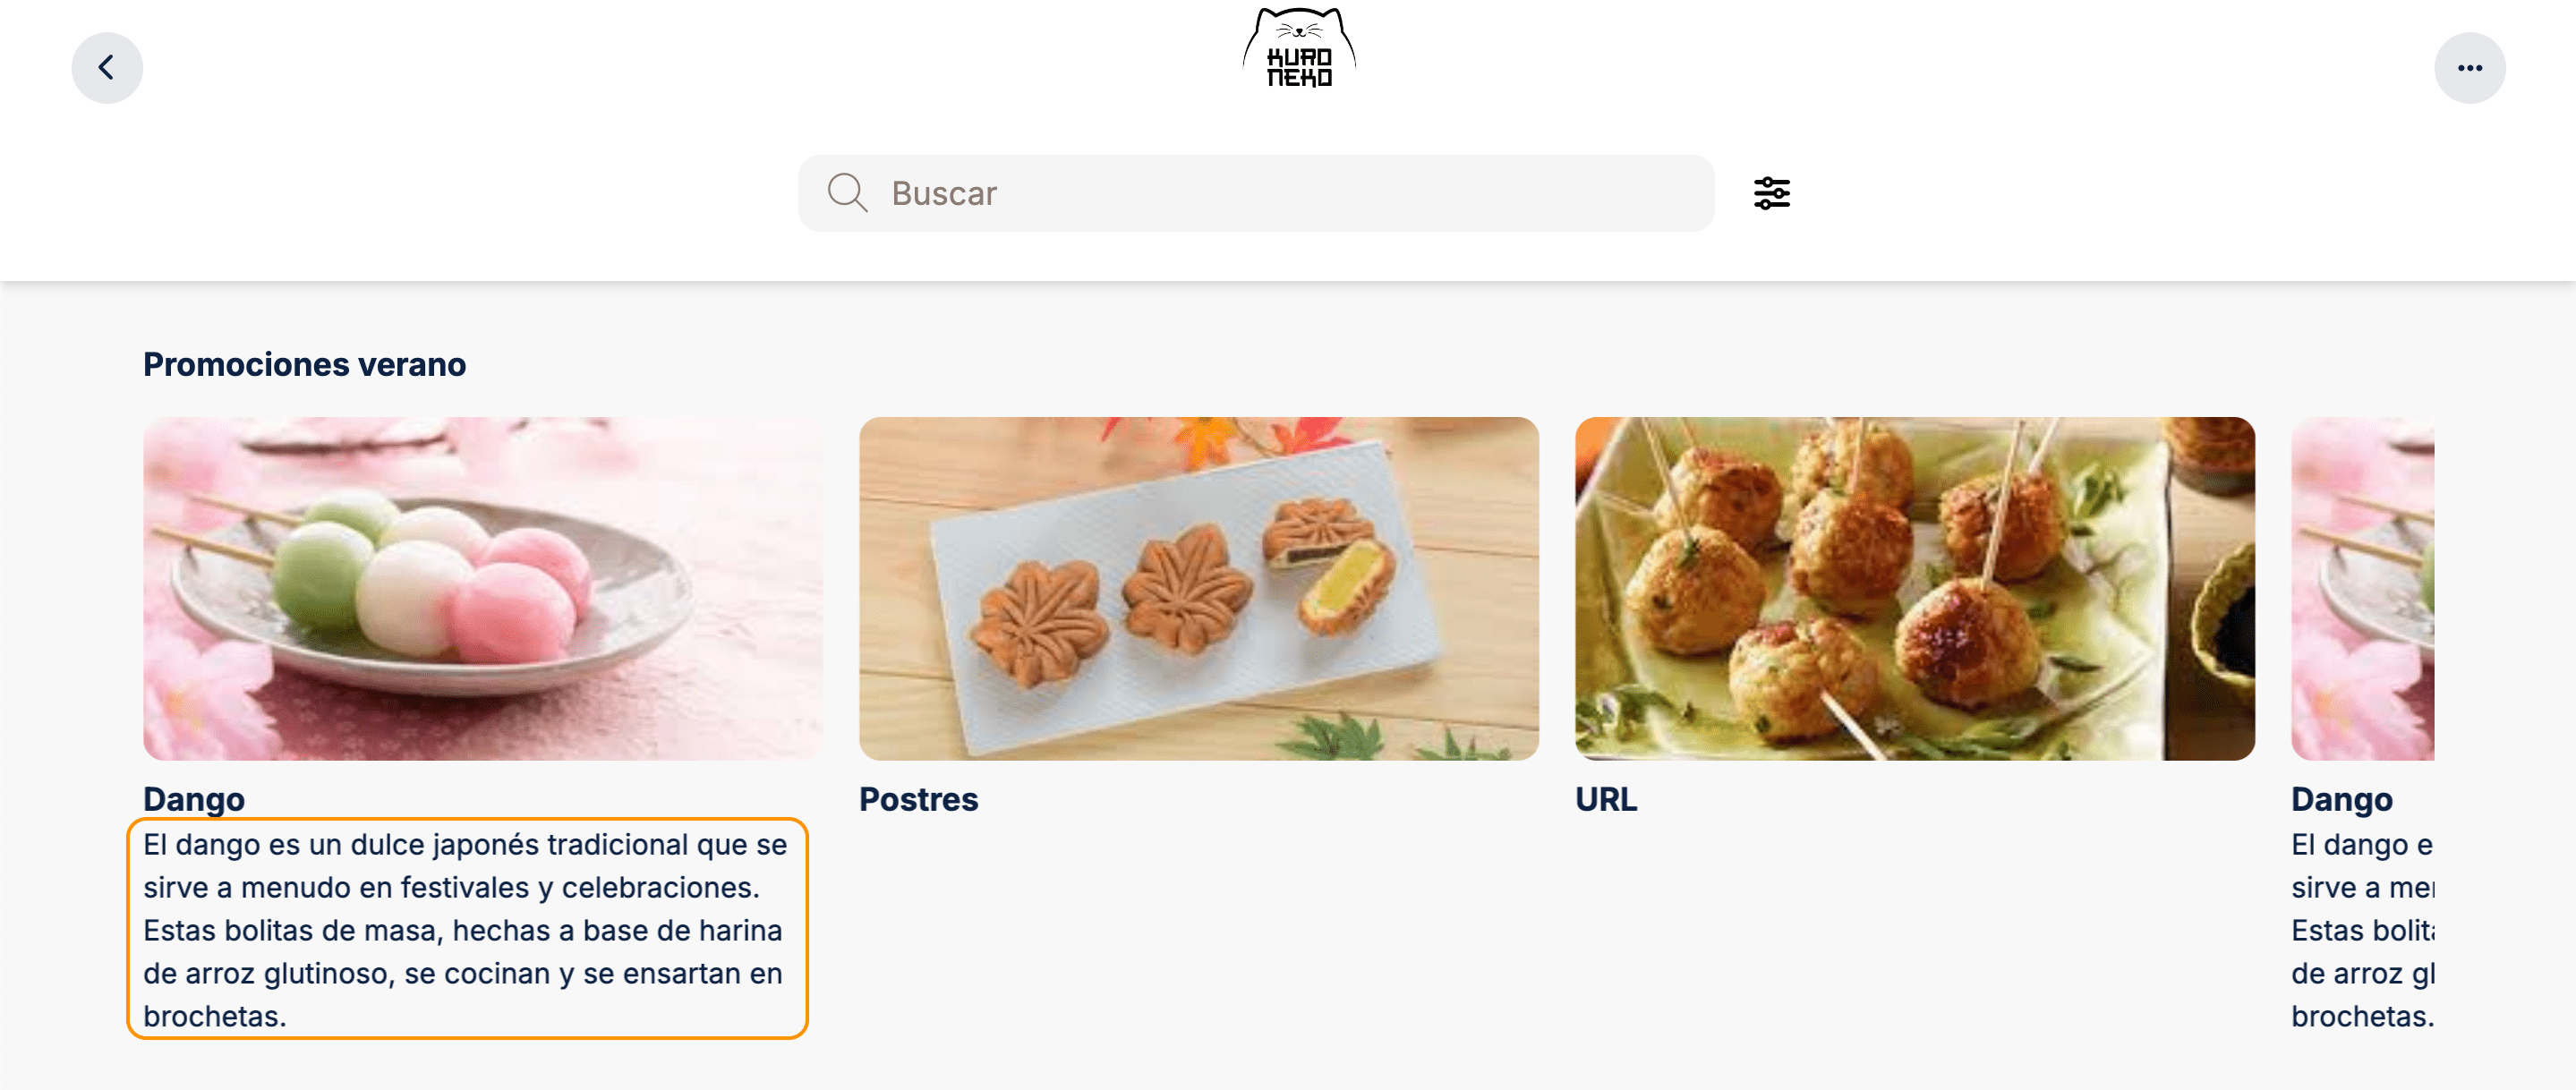
Below you will see how to set up 3 banners and how they appear in the carousel: product, category and URL.
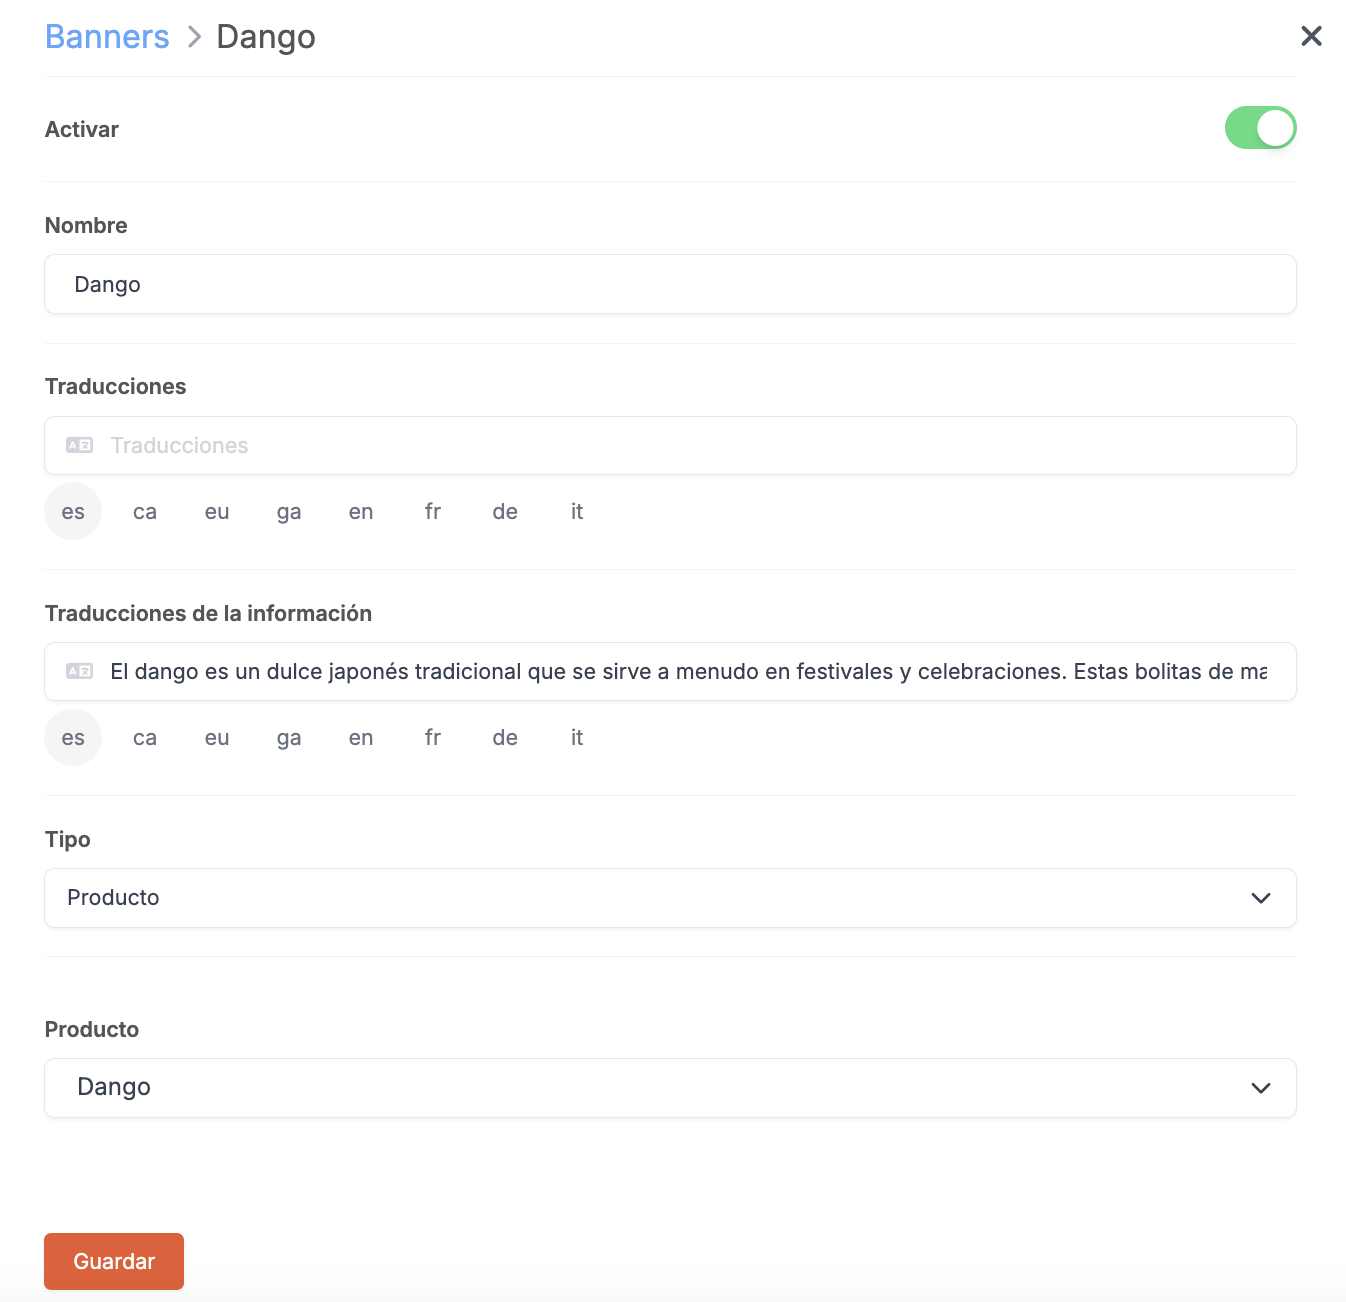
PRODUCT
Create a banner where you will recommend a product.
-
Click + New and fill in the information:
-
Click Save
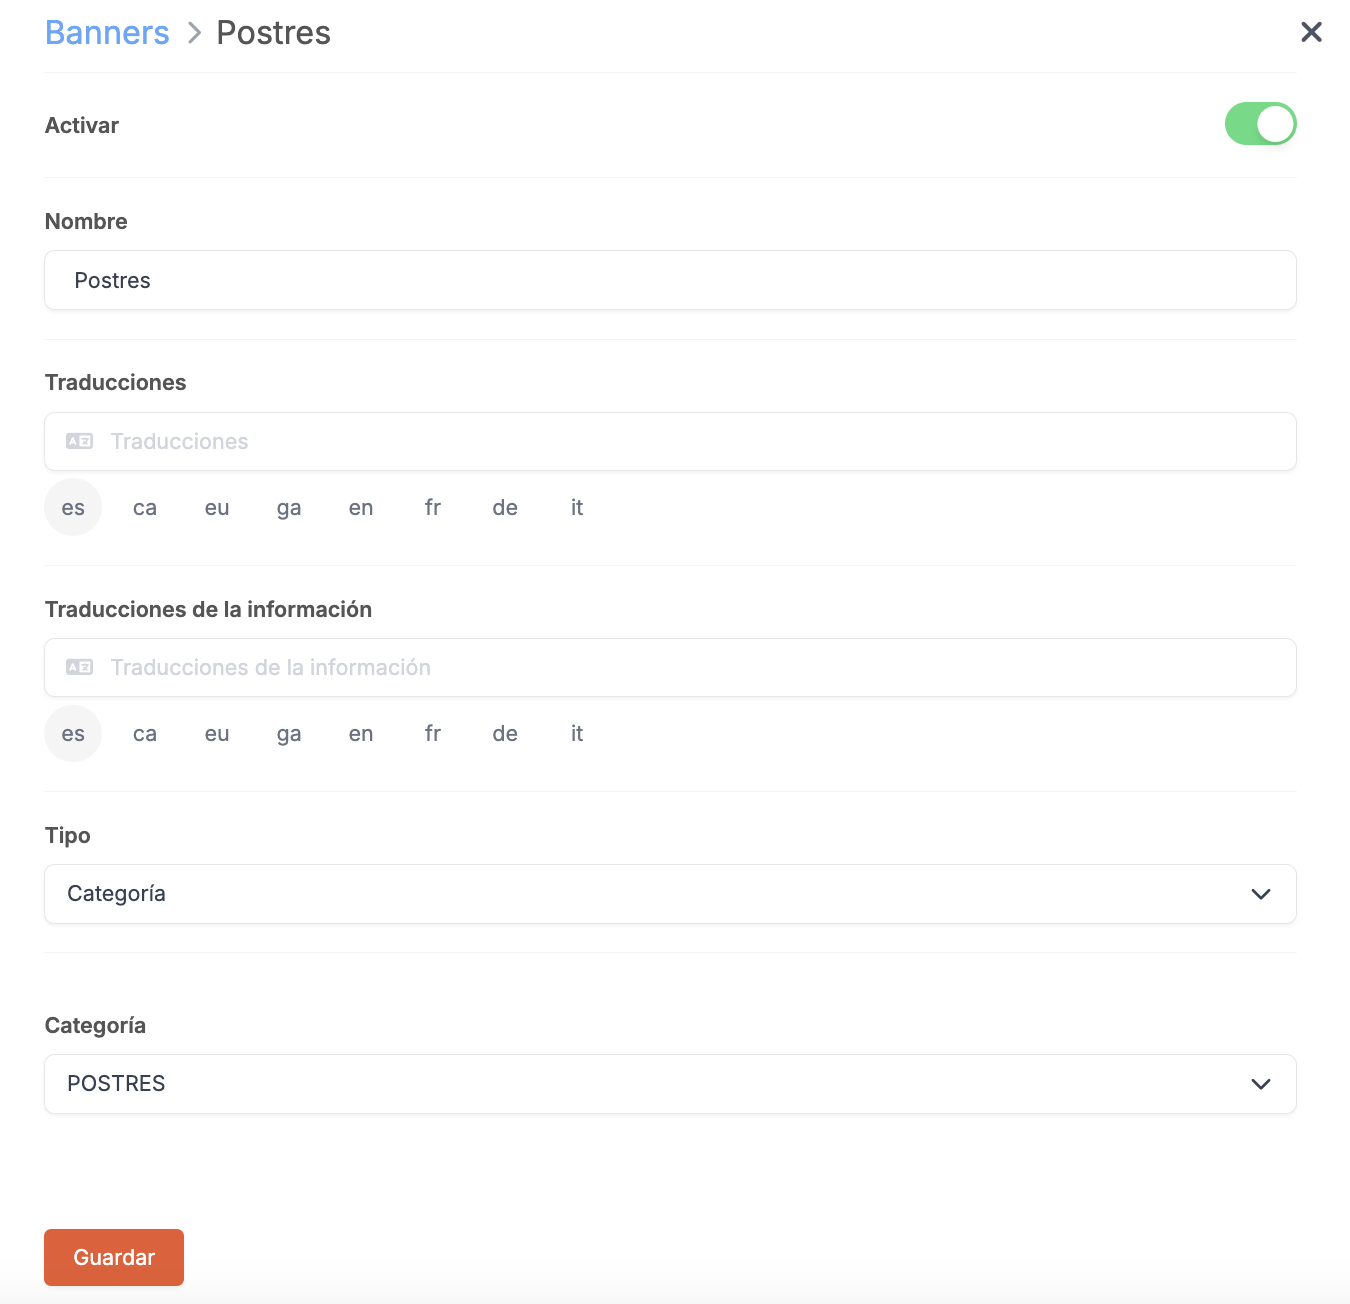
CATEGORY
Create a second banner where you will recommend the desserts' category.
-
Click + New and fill in the information:
-
Click Save
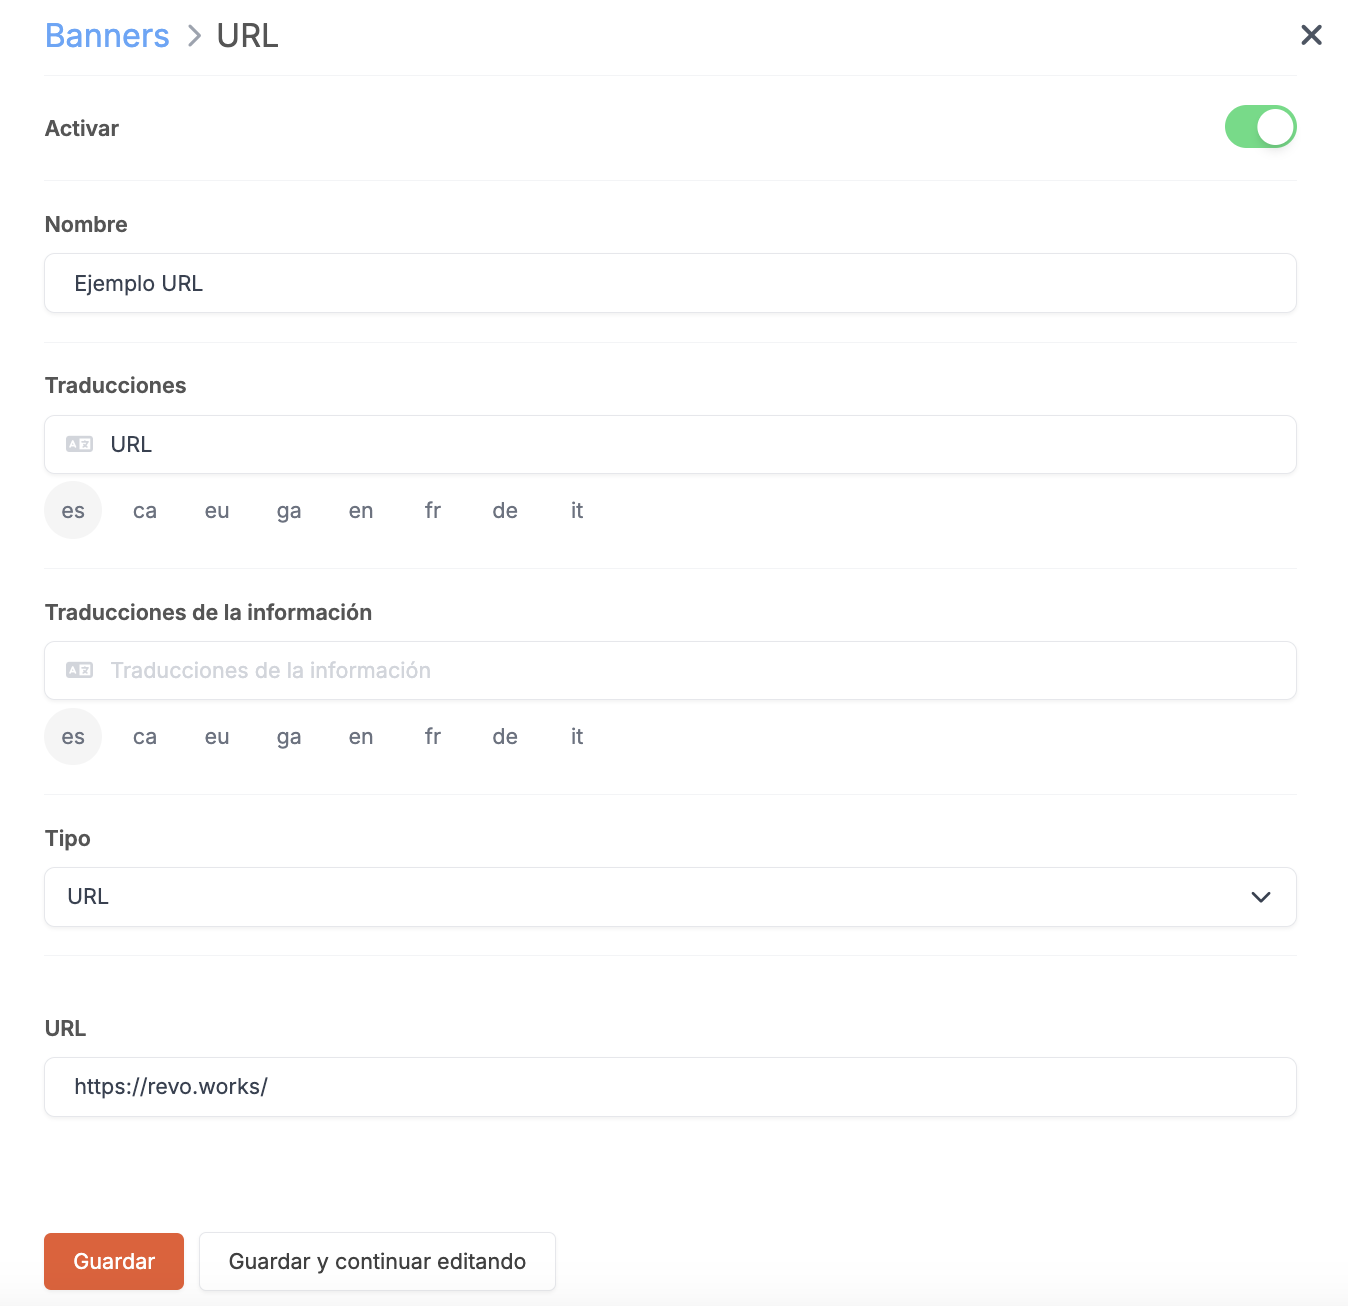
URL
Finally, create the last banner where you will add a URL.
-
Click + New and fill in the information:
-
Click Save
Now, when accessing the web app, you will see the carousel with the banners you’ve created.

For products, clicking on them will allow you to add them to the basket. The category banner will take you directly to its products, and the URL banner will open a new window, directing you to the configured address.